How a House Flip Turned Personal

Custom Dry Bar

The Party Never Ends


The Details:

Investment: $350,000-$500,000

Designer: Erin Gross of EGI Design Inc.

Photographer: Rayne Troxell

Location: Albany Park, Chicago


House flipping is a very common practice these days, and it’s something that Areté President and Vice President, Igor, and Davor, enjoy doing in their spare time. During their next hunt for a flippable property, they stumbled across a fixer-upper located in Albany Park. The house had great bones, but the interior needed a lot of updating if they were going to be able to make a profit off of it. They called their trusted interior designer and good friend, Erin Gross, to come in and design a modern space with a neutral palette that would appeal to the general buyer.

After some much-needed upgrades, the house sat on the market for three months before Davor decided it would be a good idea to keep the property for himself and his growing family. Once this decision was made, he began to add some custom features to make the place feel more like home. Knowing he loves to host, we were able to create a space that is perfect for both socializing and family weeknight dinners.

We installed brand-new hardwood flooring throughout the house along with a brand-new kitchen island, cabinets, backsplash, and appliances. We built a custom dry bar for him to display his impressive bourbon collection that leads out to a private deck equipped with a grill and outdoor television perfect for entertaining guests. Below, Davor walks us through his decision to keep the house for himself and other updates he added to make the place feel more like home.

How did you come about this property? 

Originally, Igor and I purchased this home to flip it. We remodeled the entire home with no specific buyer in mind. It stayed on the market for about three months until we realized that a lot of buyers weren’t interested in the location of the home. The backyard was bordered with a large parking lot to a local grocery store. The lack of privacy made many potential buyers feel insecure with their purchase. However, everything else about this home was great. My wife and I were looking for a home at the time, and I figured this would be a good opportunity to move into a bigger space. All I had to do was add some trees along our fence line for more privacy. 

From an investment standpoint, what parts of the home were you looking to remodel first?

The first question we needed to answer was whether we wanted to remodel the current layout or scrap it and start from the studs. Ultimately, we decided to demolish the interior and turn a 1500 square foot single story home into a 2700 square foot two story home. We figured adding a couple extra bedrooms and bathrooms in an upstairs addition would be good to increase profit. We also kept the front porch and added a back dack to extend the living space to the outdoors. 

How would you categorize the look of your home?

I would say it’s contemporary. We didn’t want to go too modern or too unique with the design when we were planning to flip it, so we kept it safe with a contemporary look. There aren’t a lot of colors or patterns throughout the home, but it has a timeless look with a simple, luxurious feel. 

Did you run into any problems with the remodel?

There weren’t any major problems with the remodel itself, however, we did have a tough time designing the place while trying to completely change the layout simultaneously. It is difficult to design the look of a space without being able to walk through it and understand the physical aspects of the home. You really can’t order your materials for your kitchen until you frame it, and even then, you will still probably have to make some adjustments with the remodeling and design. We were really trying to coordinate what could fit and what could not fit in the space. We also had to decide how much we wanted to update the exterior. From the outside, the home looked really traditional, and we knew that the inside wouldn’t exactly match the traditional feel the outside gives. Ultimately, we kept the traditional look with the front porch while the inside turned contemporary. 

Once you decided to keep the home for yourself, did you customize any parts of the design to your liking?

My wife has always wanted to have a fireplace in the home. That was her design “must have” when we decided to keep it. Before, we had a really big open family room, but we partially closed it off by adding a half wall with a recessed fireplace. We wanted the warm, welcoming fireplace to be the first thing you see when you walk into our home. We also wanted to create two separate family rooms with two separate vibes. The front room is supposed to be a relaxing, chill space where you can sit and read a book, play the guitar, or enjoy the fireplace.

Whereas, the back room was for watching TV, couch surfing, and playing with our son. Additionally, my design “must have” was a custom bar that would really wow people when they saw it. I have a pretty extensive bourbon collection, and I needed a designated area to showcase all of the bottles. It also leads out to the back deck that we customized with a privacy fence, outdoor TV, and grill area. We wanted the look of a pergola while still being able to enjoy each other’s company within the privacy of our own backyard. 

If you had to do it all over again, are there any aspects of the design that you would change?

Well, for starters, I would pick a home that I didn’t want to originally flip. Don’t get me wrong, it’s a fantastic home, I just really wish a lot of it was more customized to me and my family’s needs. I would’ve liked to have added more pops of color and texture with our bathroom tile selection, as well as unique finishes in both the bathrooms and kitchen. I also think I would’ve chosen a different cabinet color for our kitchen. White was just the safe choice at the time. I also would’ve added more color with the kitchen island and backsplash. However, overall, I really love the layout of the space. The only change it needed was a half wall for the recessed fireplace, but that was only a minor addition. All in all, keeping this home was a great decision for me and my family.

Before and After Home Renovation Tour

Chicago kitchen remodeling

Before and After Home Renovation Tour

Cool, Calm, and Collected

Chicago kitchen remodeling

The Details:

Investment: $250,000-$350,000

Designer: Ivana Stojanovska

Location: Oak Park, Illinois

In the past few years, Areté has really tried to expand business out to the surrounding suburbs of Chicago. Oak Park is one of those suburbs that we have kept our eye on. It is full of old Victorian-style homes that need just a little help staying up to date with the 21st century. Areté recognizes the importance of keeping the integrity of these homes while still catering to the modern needs of our clients. And, with that being said, we also recognize just how important architecture is to the history of Oak Park.

As the home of architect Frank Lloyd Wright from 1889-1909, Oak Park is the center of the Prairie School of Architecture, containing the largest concentration of Prairie-style homes in the country. Other important Prairie School architects worked in Oak Park, including John S. Van Bergen (born and raised in Oak Park), Tallmadge & Watson, and E. E. Roberts, who also made his home there.

Oak Park experienced a surge of residential development throughout the first part of the 20th Century, and its residential stock today comprises a wide range of styles. These include Victorian, Queen Anne, Prairie, bungalows, American Foursquares, Classical Revival, Tudor Revival, and numerous apartment buildings ranging from two-flats to large courtyard buildings, many embellished with architectural details of their period.

When a client came to us looking to renovate their English-style single-family home in Oak Park, we knew it would be a great opportunity to break into the market. The client’s main priorities were to turn the entire first floor into a modern living space while still keeping the charming features of the original architecture. You won’t believe the before and afters of this space below.

For starters, the home’s layout was very closed off. The dining room, kitchen, mudroom, and breakfast nook all had dividing walls between each room. The flow of the space started from the living room…

Oak Park Remodel1


Which then led to the dining room where we knew we wanted to expand the kitchen to. As you can see, the interior was a bit outdated with the floral wallpapers and salmon curtains.

Oak Park Kitchen Remodel

We decided it would be best to knock out the wall that separates the dining room from the kitchen(the wall behind the China cabinet). The wall is lined with cabinets from floor to ceiling, so we made sure to incorporate more storage elsewhere throughout the remodel. If you’re wondering where the fridge is, don’t worry, we asked that question, too. They had one, it’s just located out of the frame, close to where the photographer was standing.

Oak Park Kitchen Remodel

Once we decided it was best to knock down the wall between the dining room and kitchen, we also thought it would make sense to knock down the wall between the kitchen and the breakfast nook(the wall behind the stove). This wall created unnecessary separation between the two rooms and made the space feel a lot smaller than it was.

Oak Park Remodel

With two walls down and a love for demolition on the brain, we figured, hey! Why not knock down the old addition of the mudroom while we are at it. It basically served as a sunroom in the summer months and a “landing pad” for snowy boots and burly coats during the winter months.

Oak Park Remodel

(Not pictured: The snowy winter boots). Now that you have a good idea of how the original layout was spaced, you’ll be able to make sense of the after photos. And yes, there is a refrigerator in these pictures.

Chicago kitchen remodeling

Seriously, is this even the same house?! With the removal of three walls to expand the kitchen space, structural support was needed. In order to incorporate the beams as a design feature, the client opted for exposed beams that complimented the original architecture. The kitchen features a huge prep island with two dishwashers, as well as a deep stainless steel farmhouse sink. The brand new oven with extra stovetop burners was also a must-have.

Oak Park home Remodel

There’s the beautiful refrigerator we were looking for earlier…

Oak Park Remodel

Now, instead of having a living room, dining room, kitchen, breakfast nook, and mudroom in their separate areas, the living room flows smoothly into the dining room and kitchen area. The arched walkways keep the character of the home while still adding some type of division between all of these spaces. But, as you can see, this old English-style home has a much more open layout for our clients to enjoy.

Oak Park Kitchen Remodel

Remember that wall of cabinets we knocked out? To make up for the lost storage space, we added this white custom cabinetry that also serves as a pantry (pro tip: the microwave can be secretly stored here, as well). To also account for the lost mudroom, we added an extra sink and more cabinet space to keep those snowy boots and burly jackets out of sight.

Oak Park Bath Remodel

The first-floor bathroom was also updated in neutral colors and patterns to brighten up the small space. Unfortunately, we were not able to get before photos of the bathroom, but trust us when we say it got the update it deserved.

Oak Park Bathroom Remodel

We love the contrasting colors of the floating vanity and mirror, but we love how the white hexagon tiles contrast against the maple hardwood floor even more!

Oak Park Remodel

Other updates included repainting, the addition of a curved mantle above the fireplace, and updates to the office space. The color scheme of this gorgeous remodel makes anyone feel cool, calm, and collected when they step into this space. We were happy to have made our clients’ wishes come true with this welcoming open floor plan while still staying true to the integrity of this wonderful Oak Park home.

Call Arete’ Renovators at 773-610-4551 to discuss your Chicagoland home remodeling ideas with our designers. We have been building and remodeling homes and condos in Chicago and the surrounding area since 2012. Contact us for before and after house renovation photos from our Chicago renovation projects.

A Wet Room vs. Traditional Bathroom In Chicago

Chicago bathroom remodeling

Chicago bathroom remodeling

What Even is a Wet Room?

A Wet Room in Lakeview

The Details:

Investment: $40,000-$60,000

Designer: Ivana Stojanovska

Photographer: Rayne Troxell

Location: Lakeview, Chicago

Both wet rooms and traditional bathrooms add functionality to your home. They provide a place to get ready in the morning and a way to unwind at the end of the day. While these spaces have similar features, such as toilets, sinks, and mirrors, the way they are set up and function can be very different.

When a client contacted us looking to install a wet room instead of a traditional bathroom, we were excited to take on the challenge. The work that went into this wet room was extensive, but both the client and our team were elated with beautiful results. Below, we dive into the differences between the two so you can make a better-informed decision for your own bathroom remodel.

Appearance

Wet rooms and traditional bathrooms have a variety of designs and layouts. While there are many ways a bathroom can be laid out, a wet room is a little different. A wet room is designed for showering and bathing without a barrier separating it from the rest of the room. Unlike a regular bathroom, there is no curtain, splash panel, or shower door so the water could reach the space around it.

The space is entirely waterproofed so you don’t have to worry about water containment, however, this client wanted a slight barrier between the shower and the toilet. We installed a glass panel that hangs from the ceiling to save space. Wet rooms contain all of the elements of a traditional bathroom, but they are really built to take advantage of the space.

Space

The amount of space you have to work with may influence your decision for creating a wet room or traditional bathroom. Stall showers installed in conventional bathrooms can be as small as 30-inches square, with most measuring 38 inches or larger. While you do not need a specific size, anything in a wet room placed near the showerhead or body sprays could become wet. This includes things like toilet paper, hairdryers, and makeup. Therefore, it is best to create a wet room area where other fixtures and items will be out of the way of the spray.

In most cases, wet rooms allow for great flexibility of movement, which is an advantage. There is no curb to step over or door to navigate, which makes the wet room an ideal setup for people who have disabilities or trouble with mobility. Wet rooms are gaining popularity with homeowners who want to age in place and have disabilities. Because there is no curb, door track, or barrier to entry, it is easier for people that use mobility aids such as wheelchairs.

Traditional bathrooms can be modified to make them accessible, with curbless showers or additions such as walk-in tubs, roll-in showers, grab bars, and transfer seats, but wet rooms are typically easier and may be less expensive than modifying an existing room. Think of it as an open floor plan, but for your bathroom.

Installation

While traditional bathrooms and wet rooms may seem similar on the surface, the installation process is actually quite different. For one, there are fewer fixtures involved in a wet room. The other major difference lies in how the wet area is treated. In a traditional bathroom, the area is separated or contained, usually by a door, panel, or curtain. While the walls outside this area may be waterproofed, they do not need to be. So, drywall 1 or a cement backer board, which are not normally meant for wet areas, may be used.

In a wet room, the entire space is treated with the same waterproofing material. Vapor barriers 2 and a specific type of backer board are used throughout. There is no curb and thus no need to caulk 3 and risk leaks over time. The flooring in a wet room is another unique aspect. The floor must slope to the drain everywhere, which means tile is often used for most if not all of the floor.

If you use a different type of flooring, you’ll need to switch to a smaller tile in the pattern as you approach the slope of the drain. These differences are not major and will not impact installation time. It can take a while to waterproof a wet room, but it also takes some time to create a shower tray and install shower doors. In the end, they both require about the same amount of time to install.

Investment

Wet rooms cost about 20 to 30% more than a typical bathroom installation. You’ll need to spend a lot of time and money waterproofing the area. There are also some similarities between wet rooms and a typical bathroom installation, including materials for fixtures, valves, and tile. The main difference is the type of materials used to finish the wet areas. A wet room requires a special membrane and different types of tile, which can make it more expensive.

In any bathroom renovation, the biggest driving cost is size. According to Fixr.com, the average price of a bathroom renovation is $125 a square foot, so the larger the space, the higher the total expenses. For a 144-square foot traditional bath, the cost will be about $18,000 for materials and installation. The same is true for a wet room, but with the added expense of completely waterproofing the space before the finishing materials can be put down.

So, the price is closer to $150 a square foot, which means that a 144-square foot wet room would cost about $21,600. Obviously, if you had more customization to the space like our client did, the price will also increase based on the design of the wet room.

Maintenance

In both spaces, the degree of upkeep you need to perform is tied largely to the materials you choose. Using natural stone or specialty metal finishes in a traditional bathroom means more maintenance than using porcelain and chrome. Despite their many benefits, wet rooms still have some maintenance cons.

Extra ventilation is sometimes necessary to prevent mold and mildew growth. This is because the room is so waterproofed that people may not fully dry after usage which can lead to mold growth. However, if you do get water in places you do not want it, it can be mopped up easily due to the design of the room.

Resale Value

Wet rooms and traditional bathrooms have about the same resale value. Bathroom remodels in Chicago and the surrounding area currently recoup between 55 and 70% depending on the level of quality of the materials. Because wet rooms often use higher quality materials and are considered a luxury addition, they may recoup slightly more at the time of resale.

However, most homeowners want to have at least one conventional bathroom in the house. Therefore, remodeling the only bathroom to become a wet room may harm resale rather than improve it. If you are planning on reselling in the near future, we recommend taking into account your target buyers before installing a wet room.

How Our Client Designed Their Home to Fit Their New Lifestyle

Chicago kitchen remodeling

Chicago kitchen remodeling

Dinner for Two

How Our Client Designed Their Home to Fit Their New Lifestyle

The Details:

Investment: $275,000-$300,000

Designer: Ivana Stojanovska

Photographer: Elizabeth Harper – Lady E Photography

Location: Gold Coast, Chicago

If you are like one of our great clients, Jill Lowe, you realize the importance of a fine dining atmosphere in the comfort and safety of your own home during these ever-changing times. Jill, like many others, adapted to the at-home style of fine dining for two during the pandemic, and she did not disappoint. Check out her article here that explains just how she was able to create a fine dining experience with a little help from Areté. We were able to renovate the interior of her home to help give a high-end ambiance to any dinner party she is willing to throw, whether that be for two or twenty.

She experimented with table settings, task lighting, floral arrangements, and recipes that were inspired by some of her favorite Chicago area restaurants. She understands the importance of how color, lighting, and mood can affect the fine-dining space and made sure to incorporate all of these elements into her own home.

Going into this project, Jill wanted a commercial-grade kitchen that would allow her and anyone else the capability to cook high-end meals. However, she did not want the kitchen to feel like a commercial kitchen. Commercial kitchens are built specifically to handle large turnover, high output, plenty of room for heavy-duty appliances, and ample storage space. Also, they are readily equipped with robust extractor fans, ventilation systems, and hygienic surfaces that are required of a commercial kitchen.

If you were to add all of these elements to a domestic kitchen, it would feel out of place and a bit much. We decided it would be best to take some of the features of a standard commercial kitchen and add them to the design of a domestic kitchen. This resulted in adding a kitchen island that has the elements of a professional meal prep zone with domestic kitchen elements surrounding it.

The kitchen island has a stainless steel countertop that is durable, stain-resistant, and heat-tolerant. The island also comes equipped with double ovens and a touch screen stovetop from Bosch. It also has a grilling station and plenty of counter space to prepare your food. To offset this commercial look, we added a deep stainless steel farmhouse sink for a more home-like vibe. The client also wanted a mix of window and shaker-style cabinets to add visual interest to the space.

In addition to the full remodel of the kitchen, we redid a master bathroom, guest bathroom, new flooring throughout the condo, and added a fresh coat of paint to all of the walls. The maple hardwood floors stretch from the kitchen out to the living and dining room areas and add a beautiful contrasting dark tone to the space. The master bathroom features bright white Calacatta tiles in the shower enclosure with brushed nickel fixtures throughout.

Art that is personal to our clients hangs above the bathtub and makes for a good conversation piece. The master bathroom also uses mirror wall paneling to make the space feel bigger. In the guest bathroom, the shower features dark porcelain tiles with a mosaic strip of white oak pencil-honed tiles. It is finished off with polished chrome fixtures and hardware. With stunning views of Chicago and a beautifully designed dining room area done by our client herself, this luxury condo is the perfect place to have a romantic dinner for two.

A Look into How Having Double the Interior Designers Made for Double the Fun

Chicago luxury design

Chicago luxury design

Girls Just Wanna Have Fun

The Details

Investment: $35,000-$50,000

Designer: Ivana Stojanovska of Areté The Art of Design and Amy Courtney of Amy Courtney Design

Photographer: Rayne Troxell

Location: Streeterville, Chicago

When a client came to us saying she bought a condo in the Streeterville area that needs some modern upgrades, we were eager to get started on turning her vision into reality. Spending most of her time in New York City, our client needed a place that felt like home when she was in Chicago for business. And with the ever-changing Covid-19 restrictions, she needed a place where she felt comfortable working in, as well.

Our client has worked with a previous NYC-based interior designer, Amy Courtney, and decided it would be best to let Amy help her design her Chicago condo. The only issue was that our client needed someone to assist in sourcing the materials for her design and remodeling the entire interior. She luckily found Areté with a quick Google search, reached out with an inquiry, and decided we would be a great fit for her remodel.

Our in-house designer, Ivana Stojanovska, teamed up with Amy Courtney to help our client source materials, take measurements, and oversee the installations throughout the entirety of this project. Below, you will get a deep dive into some of the challenges, triumphs, and overall thought processes that went into the design from two different points of view.

Tell me a bit about the design process that went into this project, did the client have any special requests?

Ivana: The client came to us with a designer that she had already worked with on previous projects. She introduced us, and Amy presented the mood board she had already arranged for the client’s condo. One of the requests that the client had was that she wanted a home office space due to the pandemic. We did our initial walk-through with the client where we were able to see the space in person and take measurements. We also did a design consultation where we discussed Amy’s mood board, brainstormed more ideas for the space, and created drawings based on the condo’s layout. We were able to help Amy order all of the materials and coordinate deliveries to the job site.

Amy: The client and I worked together when she lived in New York City. When she told me about her move to Chicago, she explained that she felt more comfortable having me design her home because I am already familiar with her interior style. We have known each other for years and I helped design her home in New York. It was so nice of The Art of Design to allow a designer to come in and collaborate with your team. Altogether, we were able to create a design that had some new elements but still felt similar to the client’s home back in NYC.

Was it difficult collaborating with another designer that wasn’t local to you, did this change your typical design process at all?

Ivana: I don’t think it was difficult to collaborate at all. Amy took care of the front end of the design while we took care of the logistical side of things. The client was very decisive which helped save time and money. For the most part, we stuck to our same process so that there were no lapses in communication between us and the client.

Amy: The only difficulty was that we could only source materials from The Art of Design’s approved vendors. I’m used to being able to source project materials from anywhere in New York, so it was a bit challenging finding materials for the design with a list of vendors that I haven’t worked with before. However, The Art of Design handled all of the purchasing which made my life a lot easier.

What were the challenges of this project?

Ivana: Overall, there weren’t many challenges that came along with this project, but we were having some issues trying to decide on the flooring. The client wasn’t sure if she wanted to keep the existing floors or install brand new flooring throughout the space. We ended up deciding to redo the floors, and the client was very happy with the decision. Another small problem was that the fireplace wall was slightly crooked. This caused some issues with the shelving that was placed on either side of the wall, but we were able to level it out and add special hardware to ensure the shelves could hold heavy weight.

Amy: Architecturally, there weren’t many challenges with this project. The only challenge that comes to mind for me is the backsplash in the kitchen. The client had a beautiful quartz stone countertop that she did not want to replace, but she did not want a tiled backsplash. She envisioned a full slab backsplash that matched the countertop, but we were having issues sourcing a stone that matched. It was either replace the countertops with a stone that would match the backsplash or leave the existing countertops with no backsplash. We couldn’t match the stone, so we kept it the way it was. In a perfect world, we would’ve had a matching full backsplash and countertop, but I still think the design of the kitchen turned out really pretty.

What parts were the most fun for you?

Ivana: I absolutely love her office space. It came out beautifully and was different from any other office space I have designed before. It is very open and flows with the overall design of the condo. The custom-crafted woodwork you find in the office is something you can’t find anywhere else. We worked with a local Amish woodworker that built the partition and the client’s desk. The desk itself has a motorized feature that allows you to work sitting down or standing up, and the partition’s design is completely unique to what the client wanted. I also loved the wallpaper and double herringbone design in the bathrooms. It is very bold and stylish.

Amy: I loved designing with the wallpaper in the powder room and the bedroom. The wallpaper in the powder room is from Anthropology and is my absolute favorite. I love playing with fun patterns and textures, and wallpaper can really elevate a space when used correctly. The custom partition that separates the living room from the home office was also really cool to see be brought to life.

Did anything stand out about this project for you compared to others you have worked on?

Ivana: Other than the custom design elements, this project was pretty similar to other high-rise condos we have remodeled. The client’s building was very easy to work with.

Amy: Design-wise, this project was very similar to other projects I have worked on. I mainly do work in New York high rises, but working with a Chicago high rise was a whole different experience. It was a lot easier compared to some of the buildings I deal with in New York City. There was a lot less paperwork involved, it was easy to get in touch with the building manager, and they were very straightforward with any questions I had.

How would you categorize the design of this project?

Ivana: It is very modern with a touch of bohemian flair. A lot of the style was transferred from New York City to Chicago, so we don’t see many designs like this here. It is something from the future, and I think we will start to see plenty more modern bohemian-styled places going into 2022.

Amy: I would categorize this space as modern feminine. The client definitely likes modern style, but you can see her unique touches throughout the condo that really make this place her own.

What’s your “designer tip” on how to tie a space like this together?

Ivana: I think location is a really important part of design. Everything should have a designated place in the design, and it is important that you communicate with your client to know where that place should be. Lighting is another important factor that ties spaces together. Having the same fixtures and type of lighting throughout the design allow for the space to flow seamlessly from one room to the next. We also made sure to achieve a neutral background palette with strong pops of accent color.

This ensured that the client’s style was seen throughout each room, but it was subtle enough that she could resell the condo if she wanted to in the future. An example of this can be seen in the bathroom and the bedroom. The bathroom is mainly white, but it is paired with contrasting matte black finishes that then compliment the black and white floral wallpaper in the adjacent bedroom. It flows really well together.

Amy: My tip is to create a mood board presentation. Whenever I do a project, I present a mood board to the client so we can physically see the cohesiveness of the design before the remodel takes place. A cohesive design and color scheme are very important to me. It’s worth noting that you can introduce different colors in other rooms, but the style should still flow together.

If you are thinking of remodeling your Chicago home or condo, call us at Arete’ Renovators at 773-610-4551 and let our interior designers work with you to create a design that reflects your own personal style.

History Repeats Itself

History repeats itself

An Insider’s Look into the Details of this Historic Restoration

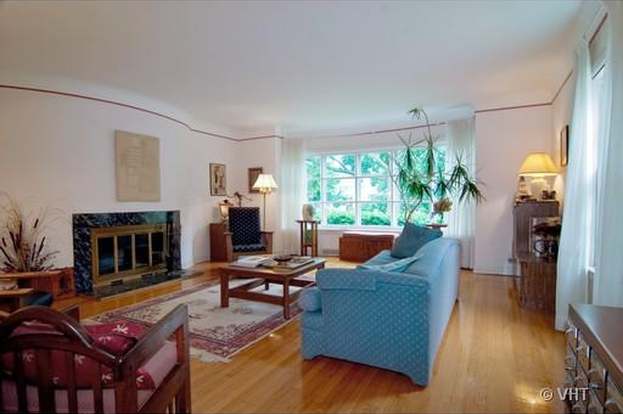
Located close to Chicago’s ‘El’ tracks, this 132-year-old historically significant home has withstood over one hundred years of Chicago’s harsh winters, humid summers, and rumbling elevated trains. In 2010, owners commissioned Areté Renovators to restore this Romanesque Queen Anne-style home to its original beauty.

Our clients were passionately involved in every aspect of architectural, interior design, and construction. What truly excited owners about the house was the potential to restore the residence and then to live in an authentic antique. They had no interest in modernizing or “gut rehabbing”. They were committed to working with the original historic elements of the house by bringing out the home’s completely unique beauty and making it a special home for their family of six.

Our company initiated construction with interior renovations and then proceeded to work on a three-story masonry addition. The addition to the home included space for a two-car garage, scullery, three-story winding maple staircase, loft, energy-efficient Marvin™ windows, doors, an upgraded 400 amp electrical system, radiant heat in the floors and garage concrete slab, TJI engineered joists, OSB sub-flooring, hardwood maple floors throughout addition, Quiet Rock, Majestic Eco-Star roofing slates, and a modified roof. A wrought iron exterior deck and rails with a natural flagstone deck, custom woodwork, and milk-based paint completed the project.

Areté Renovators, the architects and designers, and the clients were committed to maximizing “Green” construction possibilities throughout this project. The most significant and sensitive changes were made to the north and west elevations of the existing house that included kitchen renovation, bathrooms, and a three-story masonry addition. The changes throughout the project improved the living space functionality of the house by improving the work and living areas without altering the original design.

2214 North Bissell Historical Backdrop

The original owners purchased two recently divided lots (each 25 feet by 125 feet) in that area then known as the Sheffield Farm Addition. In 1879-1880, 353 Bissell Street was built. It became 2214 North Bissell Street in early 1889 when the City of Chicago annexed what was then Lakeview Township and changed the street numbering system. Original owners built the first house on the block, a fourteen-room red brick mansion utilizing both lots.

On May 4th of the year before, less than three miles away, the infamous Haymarket Square Riots took place. A few years later construction began on the massive Saint Vincent DePaul Church that would go on to anchor DePaul University that was established in 1898. In 1900, the Northwestern Elevated Railroad Company (which later became the Chicago Transit Authority) built the elevated train tracks running through the back fifty feet of the original owners’ lot.

Concrete footing and foundation placement for addition

Excavating the foundations for the 18’w x 37’L addition with no easements between the existing 132-year-old historic home and Chicago Transit Authority elevated tracks and subway presented a major challenge. Construction equipment had very little room to maneuver during the excavation process.

Concrete is environmentally friendly in a variety of ways. The ingredients of concrete (water, aggregate, and cement) are abundant in supply and take a lesser toll in their extraction than other construction materials. Quarries, the primary source of raw materials, can be easily reclaimed for recreational, residential, or commercial use. Or they can be restored to their natural state.

As a nearly inert material, concrete is an ideal medium for recycling waste or industrial byproducts. Many materials that would end up in landfills can be used instead to make concrete. Blast furnace slag, recycled polystyrene, and fly ash are among materials that can be included in the recipe for concrete and further enhance its appeal. Waste products such as scrap tires and kiln dust are used to fuel the manufacture of cement. And even old concrete itself can be reborn as aggregate for new concrete mixtures.

Further characteristics of concrete are waste minimization and long life. Whether cast-in-place or precast, concrete is used on an as-needed basis. Leftovers are easily reused or recycled. Concrete is a durable material that actually gains strength over time, conserving resources by reducing maintenance and the need for reconstruction.

Masonry

Once the concrete foundation had cured the masonry phase moved into high gear. Due to the fact that winter conditions were in effect, the masonry subcontractor enclosed the work and heated the enclosure. CMU blocks with rebar strengthening were covered with red face brick that closely matched the existing home.

The decision to use masonry for the addition is because masonry is energy efficient with insulating value and high-thermal mass. Also, this type of construction material utilizes thermal lag to reduce peak energy loads, thus decreasing the size of the building HVAC system.

A key reason to use masonry is that the thick, heavy walls of a masonry building give it inherent soundproofing which was critical in the construction because of the close proximity of the CTA trains next to the addition. The heavy walls also give a masonry building ‘heat capacity.’ When you live in a climate with 30-degree temperature swings daily (like Chicago), these heavy walls mean that you do not need as much insulation in the walls. Better insulation capacity means lower heating bills.

The masonry construction included a stairwell enclosure that was to be the location of a winding three-story hardwood maple stairway leading up to the third floor of the existing home. Upon completion of the masonry work, all existing and new masonry was washed and cleaned with a non-toxic cleansing agent.

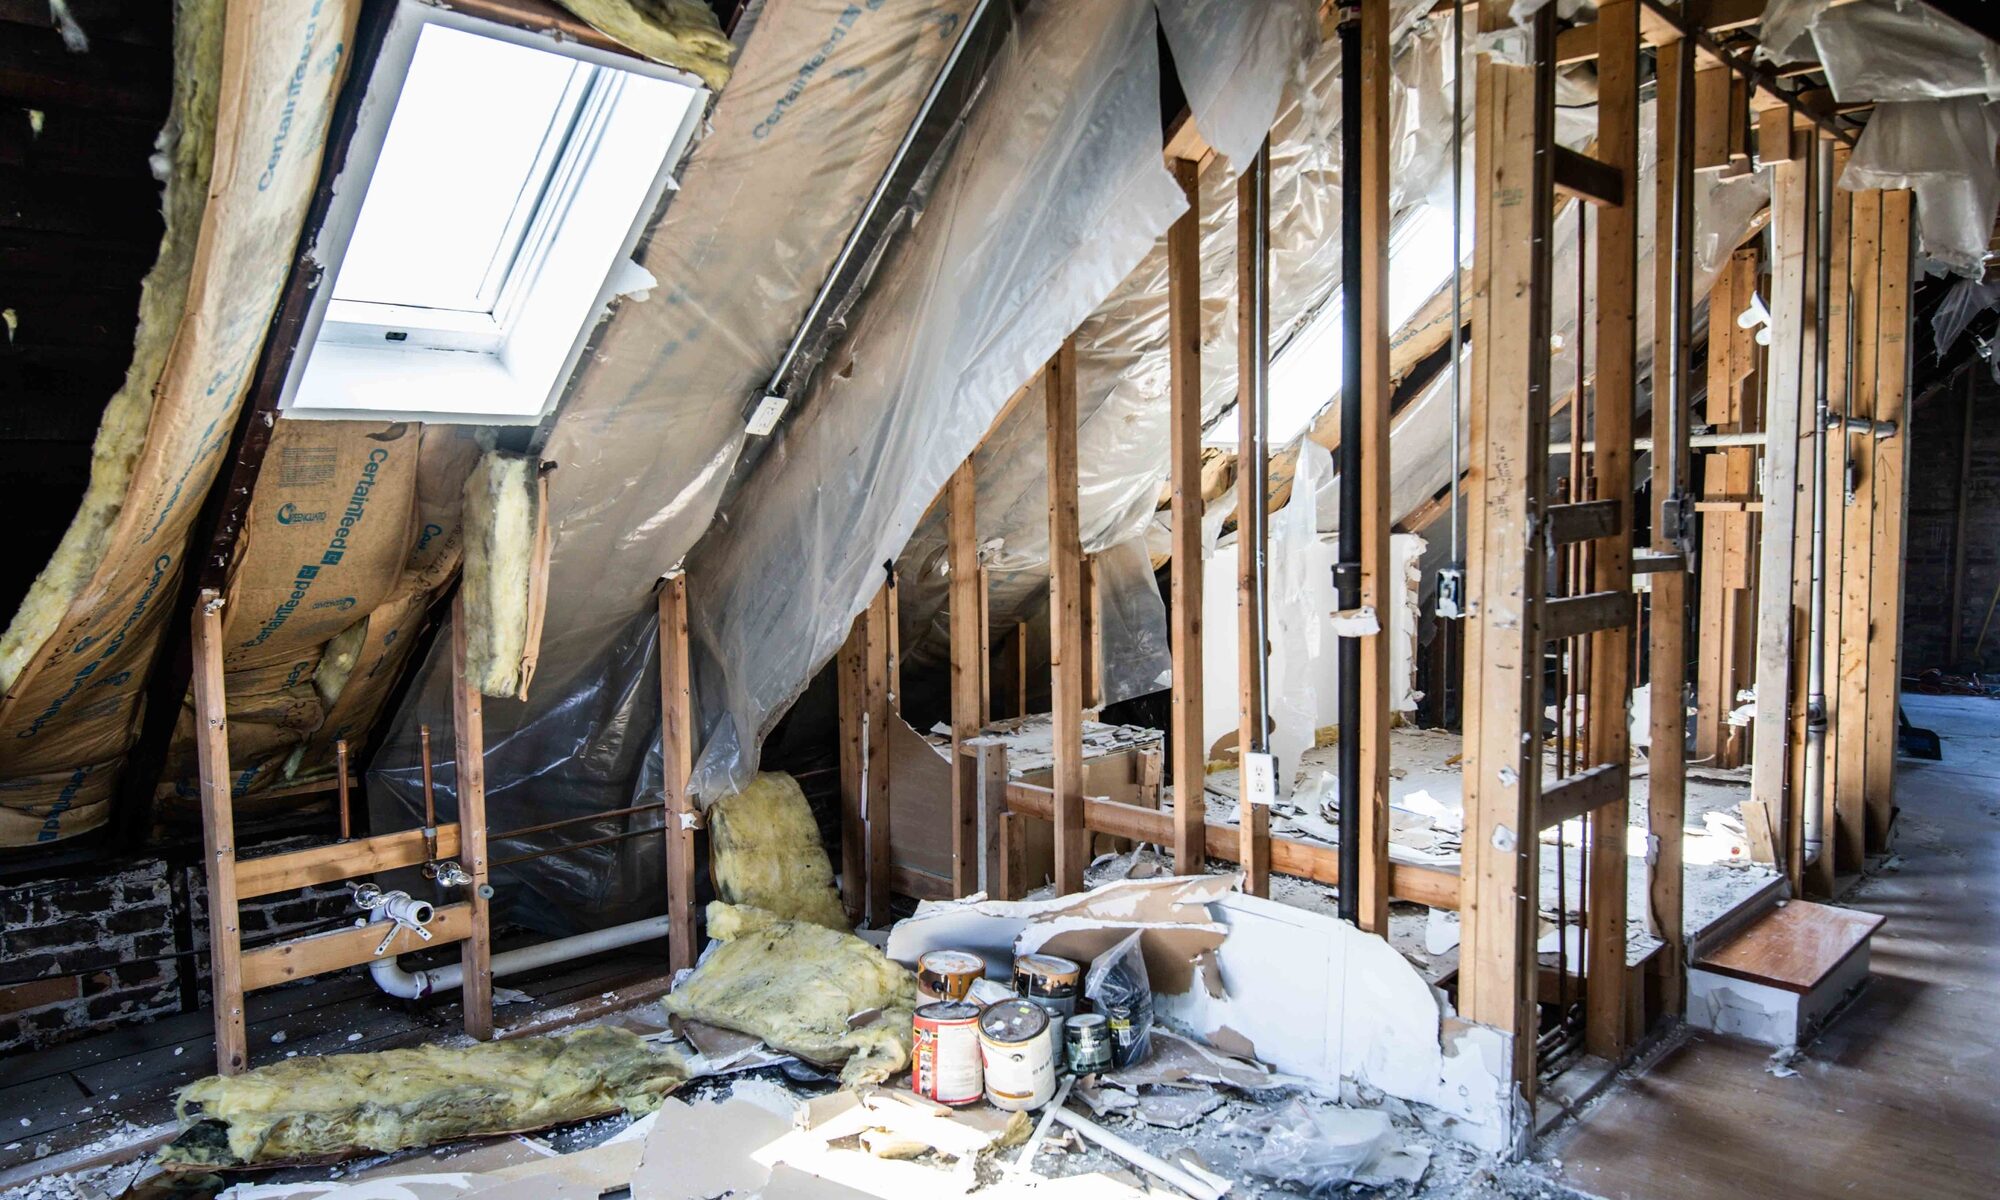
Framing and Insulation

The framing was started in the heart of the Chicago winter even as the masonry contractor was working on the second-floor level. The floor and roof framing were designed as a singular system using ledgers bolted into the CMU blocks with Hilti anchor bolts, wood “I” beams hung onto the ledger with steel hangers, OSB subflooring glued and screwed to the wood “I” beams to reduce potential squeaks. This system is labor and cost-efficient by using construction techniques that save energy and labor.

One of the most challenging aspects of the project was melding the new addition’s roof framing with the existing home’s multi-angled, multi-dormer, multi-gabled slate roof. The entire existing west elevation slate roof and metal flashing were replaced with new EcoStar recycled slate roofing material. The roof on the new addition also used the same materials.

Once the framing was completed radiant heat tubing was placed on top of the OSB subflooring with 2” x 2” “sleepers 16” on center and then lightweight concrete was placed between the sleepers and over the radiant heat coils. The tubing was then covered with additional OSB subflooring and maple hardwood floors.

Eco-tech spray insulation covered every possible gap in between joists, roof, and wall framing. Once this phase was completed special Quiet Rock gypsum board was placed over the roof and wall framing and taped.

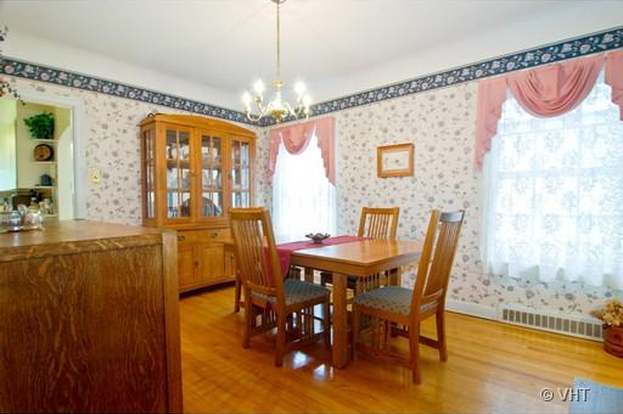
Existing Home Kitchen Renovation & New Addition Scullery

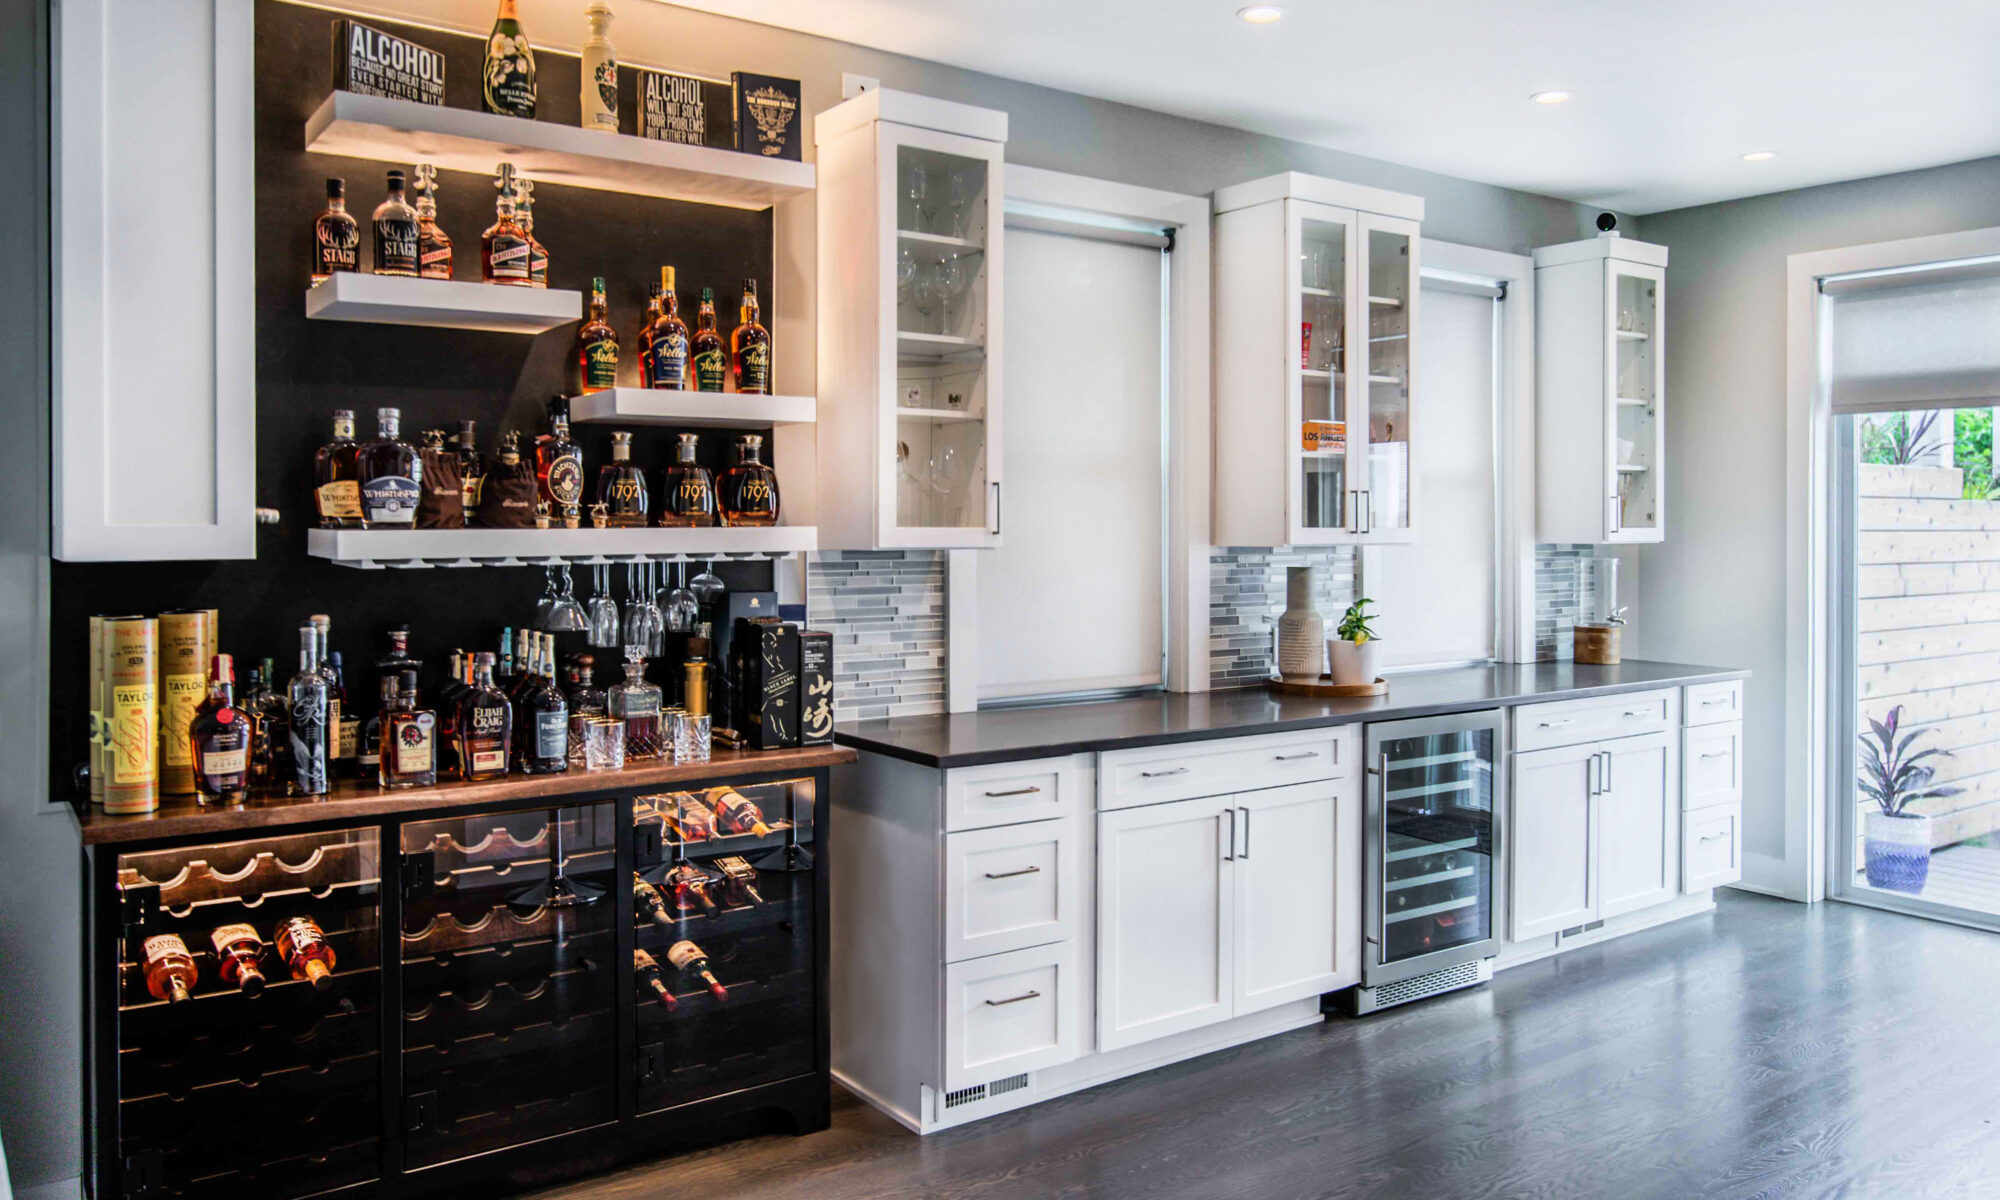
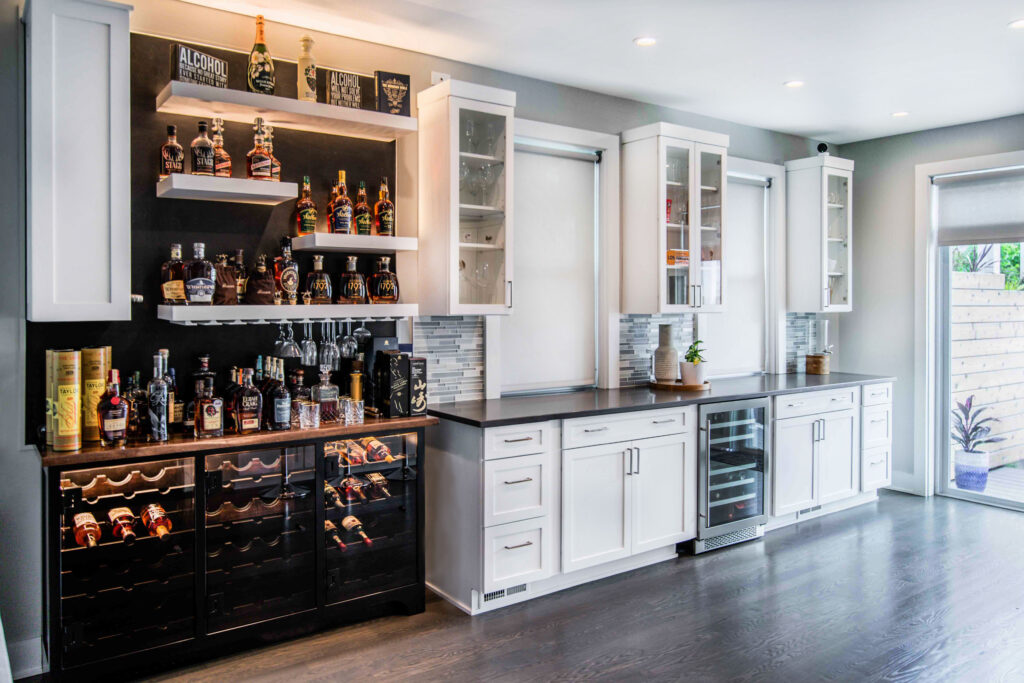
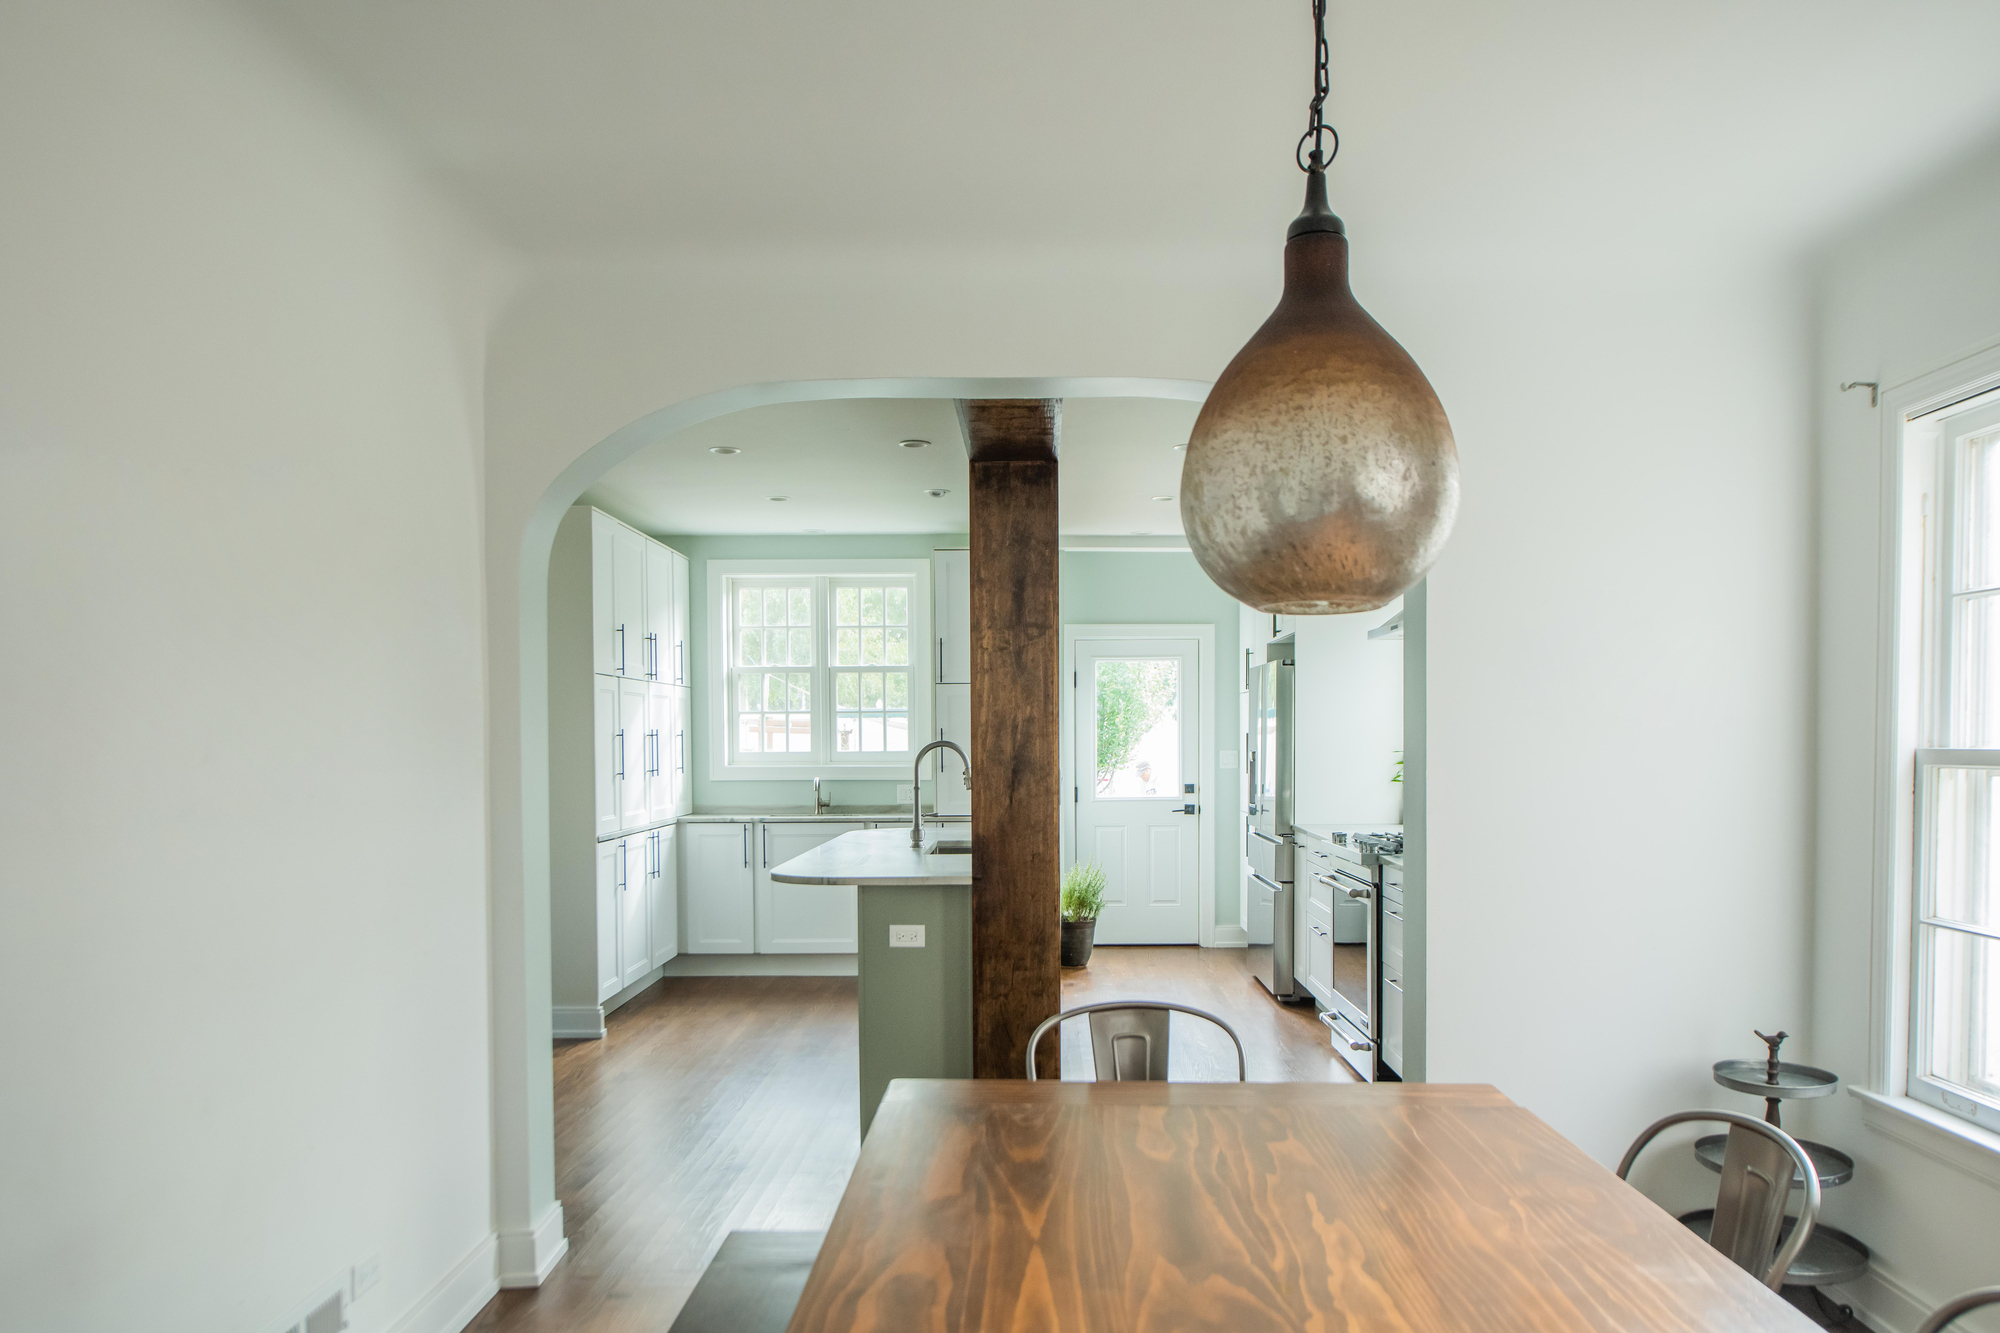
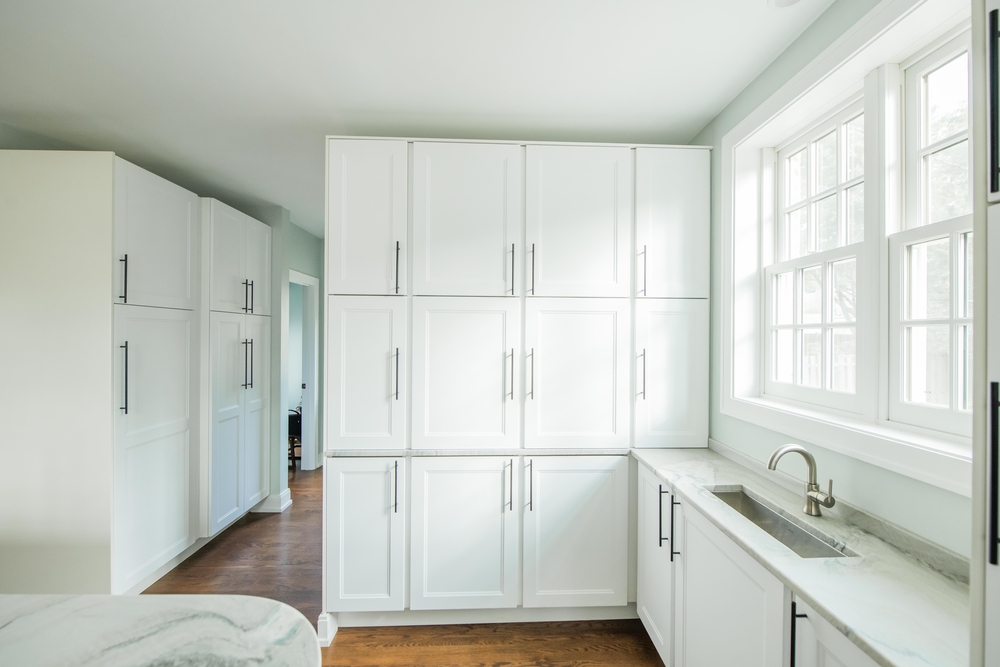
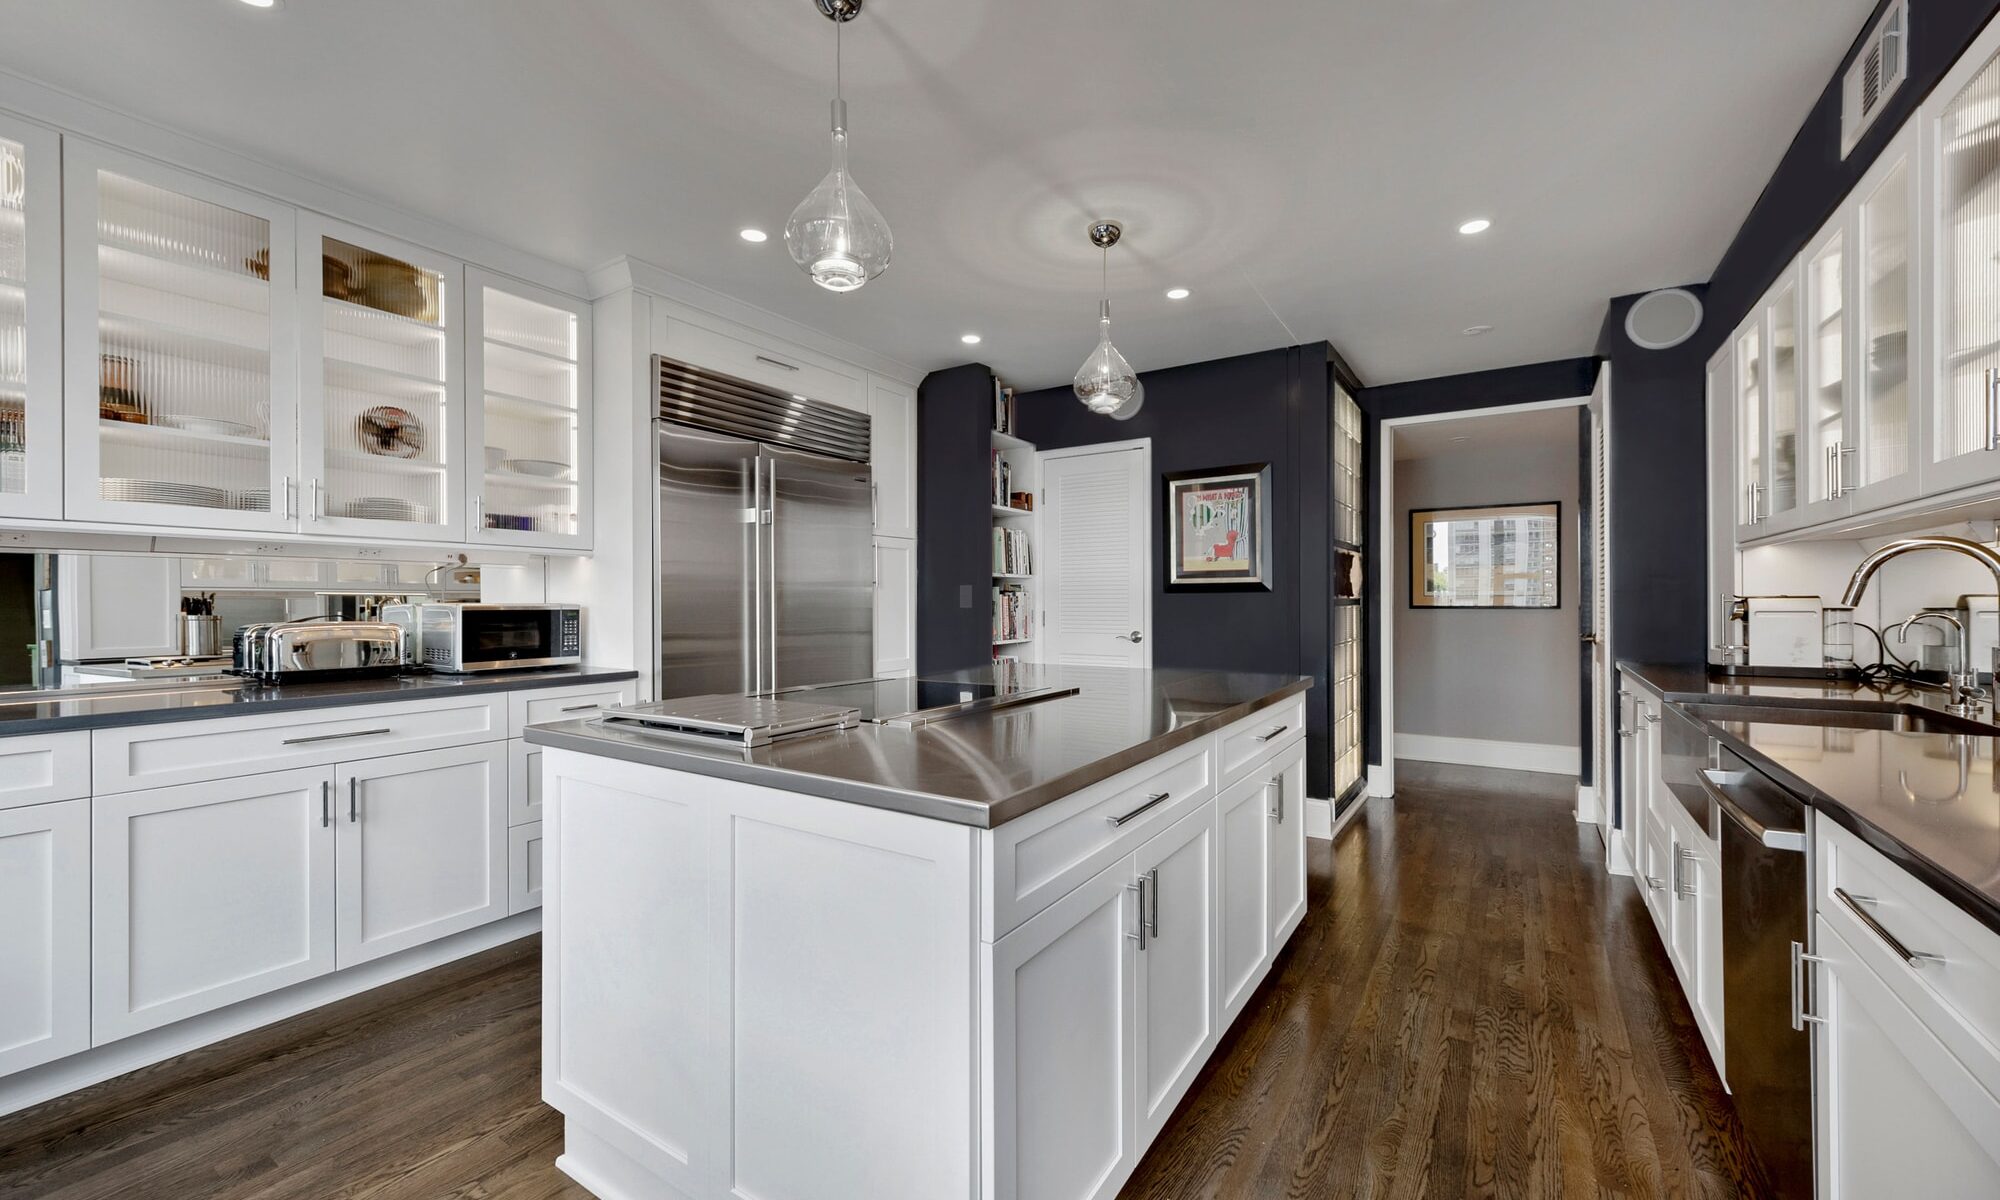
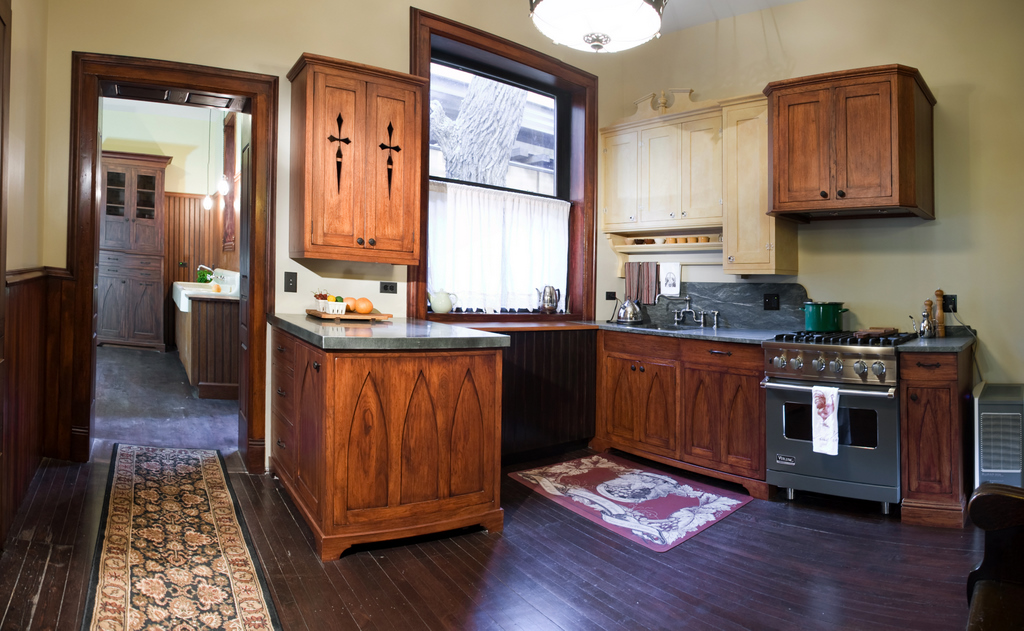
One of the true renovation centerpieces in the existing home is the kitchen design renovation and new addition scullery. The owners had a distinct vision regarding the kitchen design and were intimately involved in every phase starting with the selection of the design team and final installation by our company. Each kitchen wall and base cabinet was unique and distinct in form, finish, and color.

The kitchen countertops reflected this quality and presented different textures from zinc countertops to wood countertops. The kitchen walls were finished in quiet rock gypsum board and finished with milk-based paint. There was period-style wood wainscoting installed by our craftsmen who paid attention to every detail through the installation process. The existing floor was refinished and stained to match the rest of the existing floors throughout the house.

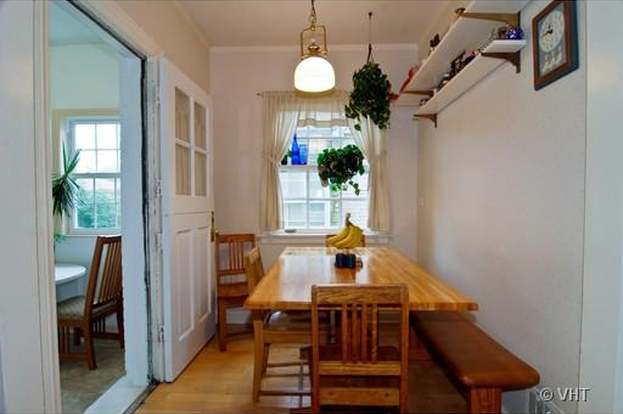
The maple floors in the kitchen are original to the house, but we needed to take up 3 or 4 layers of flooring to get to those floors. Wainscoting in the kitchen is original to the house. The renovated kitchen flowed into the scullery of the new addition. There, a period Kohler 1920’s era cast iron farmhouse style kitchen sink was installed with additional unique cabinetry installed that reflected the same vision that owners brought to the renovation of the kitchen. A

12’ ceiling in the scullery with an open three-story winding hardwood maple staircase framing one side of the scullery puts a dramatic exclamation point to this design.

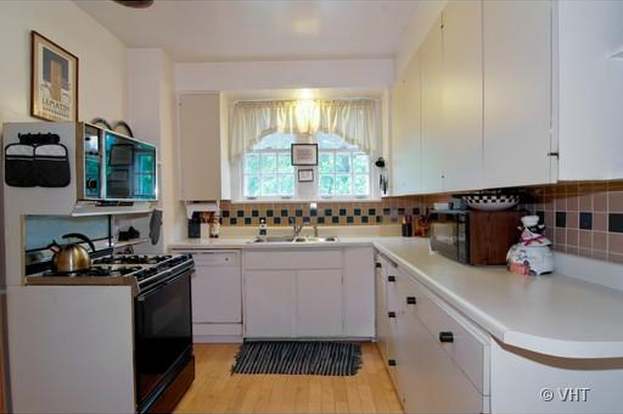
The goal of this kitchen renovation – with scullery addition, was to bring it into the 21st century while taking into consideration the beautiful Victorian-era details of the original design.

The owners asked for a period kitchen with functionality. They wanted to use a mix of materials and did not want the cabinets to look “new”. We worked together to ensure that all materials looked as if they had been there all along and to create an environment that felt true to the original architecture and styling. The designer created a process so that the client’s intentions could be realized. This evolved over time as they discussed lifestyle, appliance preferences, and materials.

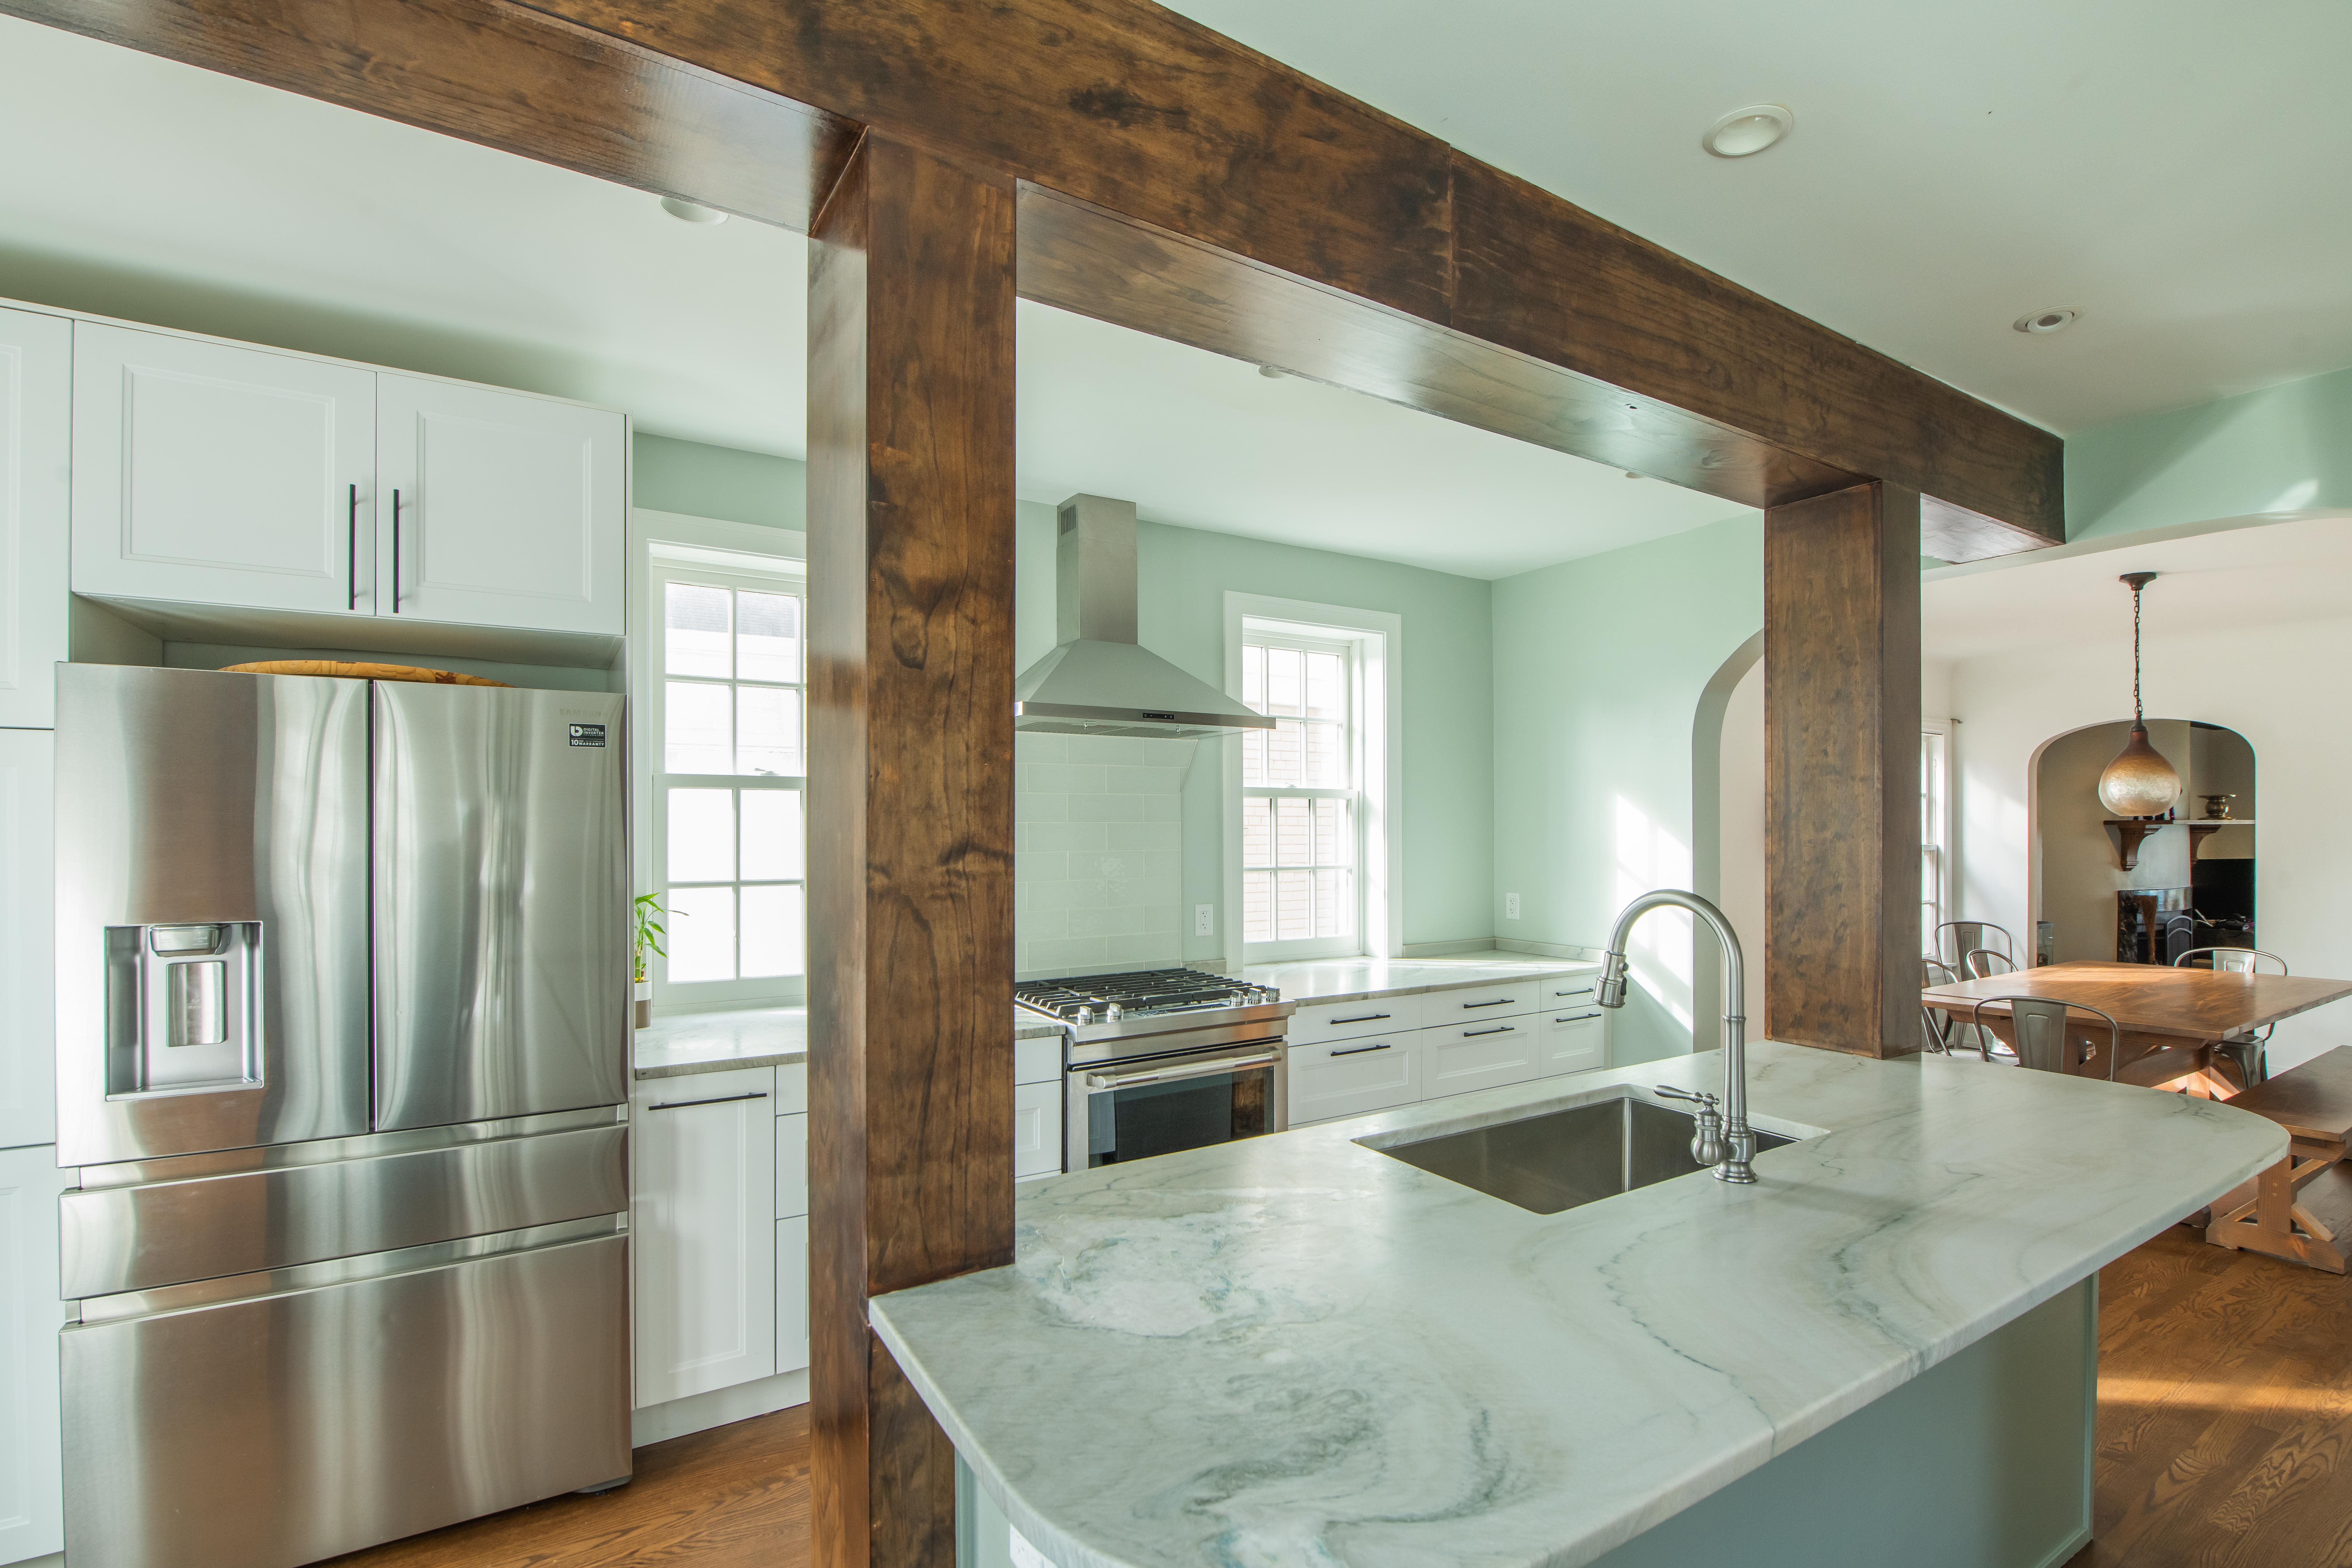
The centerpiece of this beautiful Victorian-era renovation is the kitchen and scullery flowing right out of the kitchen into the new three-story addition built by our company. The 12′ ceiling in the scullery with the open three-story stair framing on one side of the scullery adds a dramatic exclamation point to this design. The owners had a distinct vision regarding the kitchen and were intimately involved in every phase starting with the selection of the design team and final installation by our company. The scullery became a way to extend the working kitchen and provided hidden laundry facilities.

The kitchen and scullery were designed in a period style and reflect an “unfitted” approach to kitchen cabinetry. A mix of finishes and materials provide furniture styling and unique custom vignettes. In the scullery, a period Kohler 1920’s era cast iron farmhouse style kitchen sink was purchased by the client and fitted with additional unique cabinetry that reflected the precise vision of the homeowners. Our client’s enthusiasm and ability to resource wonderful antique lighting fixtures and hardware added to the uniqueness of the finished product.

The designer designed the bones of each space and guided owners in building a functional as well as beautiful space. The painted cabinets – Designer’s Custom Signature line, were primed at the factory and finished painted on the job site by a local craftsman. Antique distressed Hickory was the chosen wood species for the remaining perimeter cabinets while walnut was utilized for a very stylized Gothic hutch.

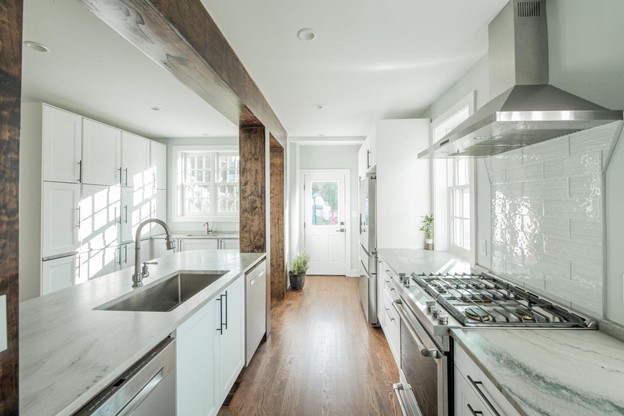
The kitchen countertop materials include Ocean Stone at the main sink, distressed wood along the window wall, and antiqued zinc on the peninsula. The Sub-Zero 736 is recessed into the walls and is covered in reclaimed wood panels that resemble an old “icebox”. The kitchen walls were finished in quiet rock gypsum board and finished with milk-based paint. There was period-style wood wainscoting installed by our craftsmen who paid attention to every detail through the installation process.

Missing millwork elements were carefully and skillfully recreated by our company. The existing floor was refinished and stained to match the rest of the existing floors throughout the house. The renovated kitchen flows into the scullery in the new addition. The existing back entry door was removed and allowed this connection and increased functionality. In this kitchen, we created beauty as well as function for our clients.
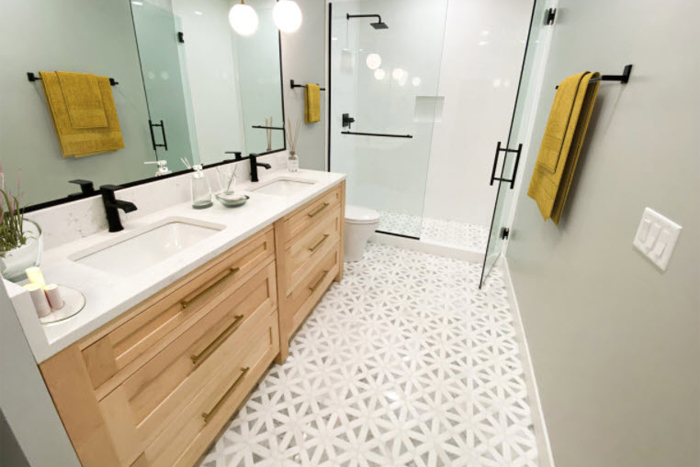
Bathrooms

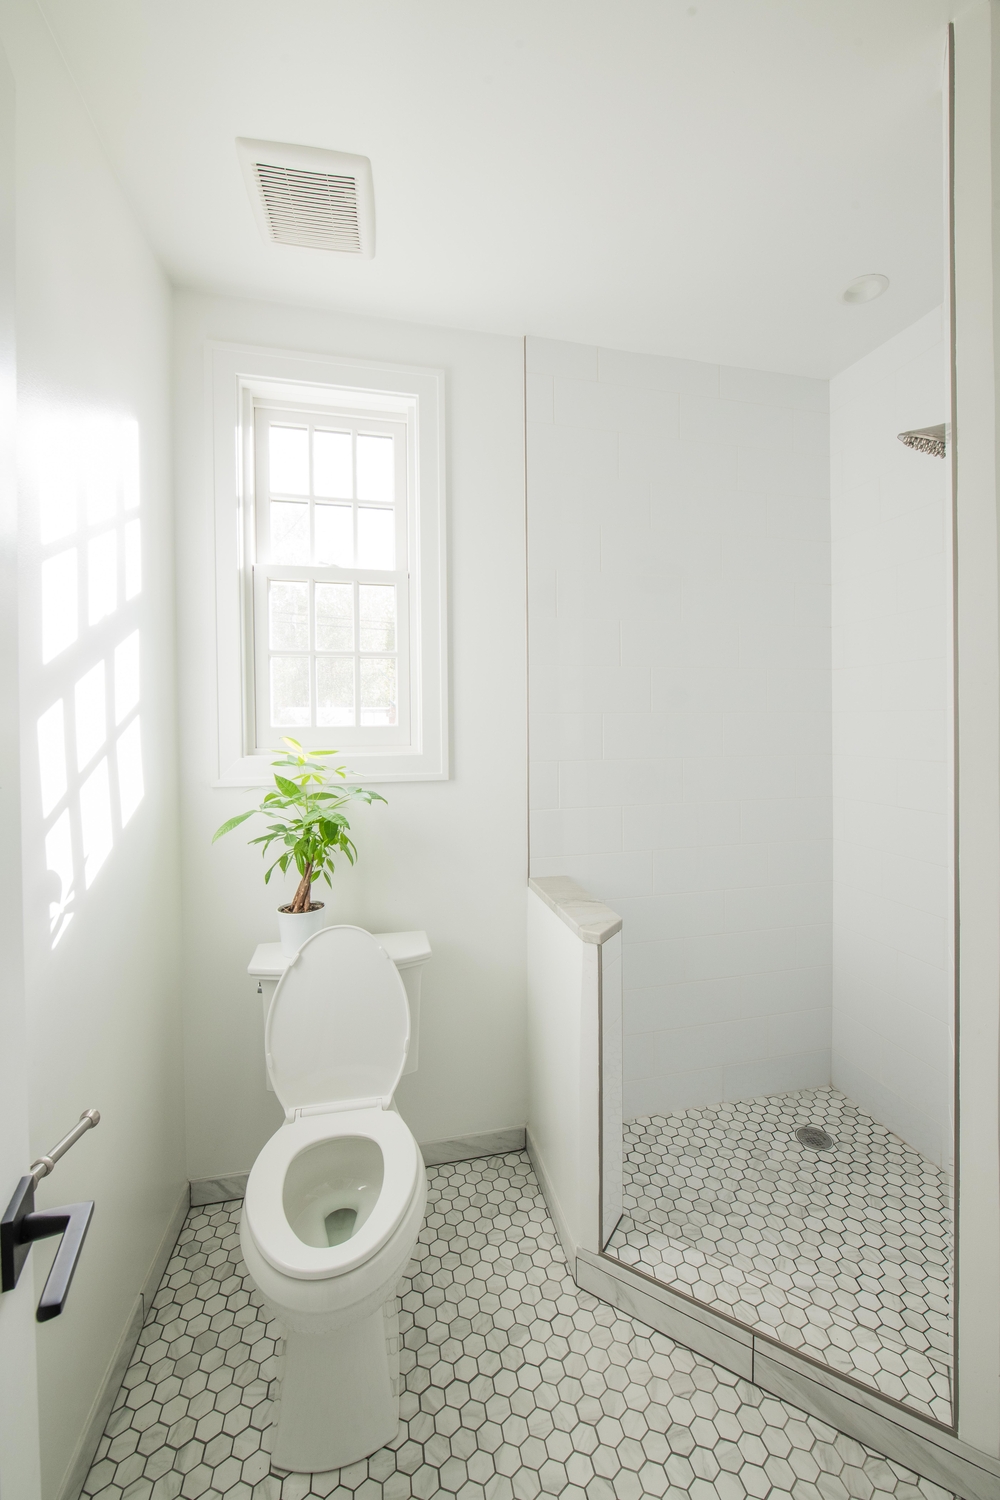
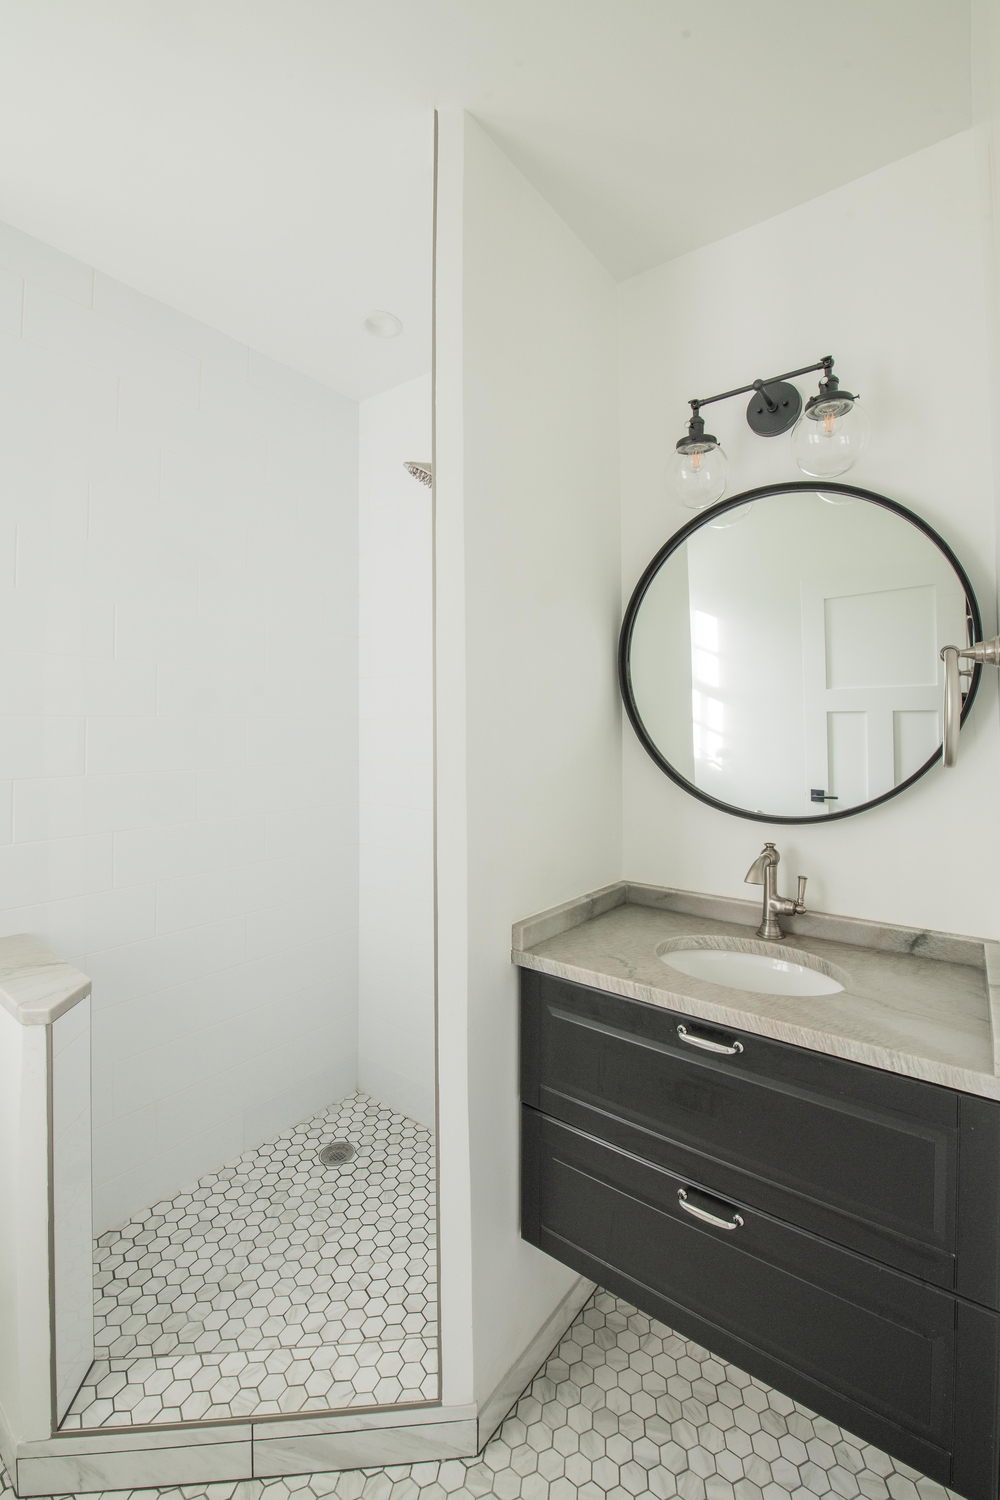
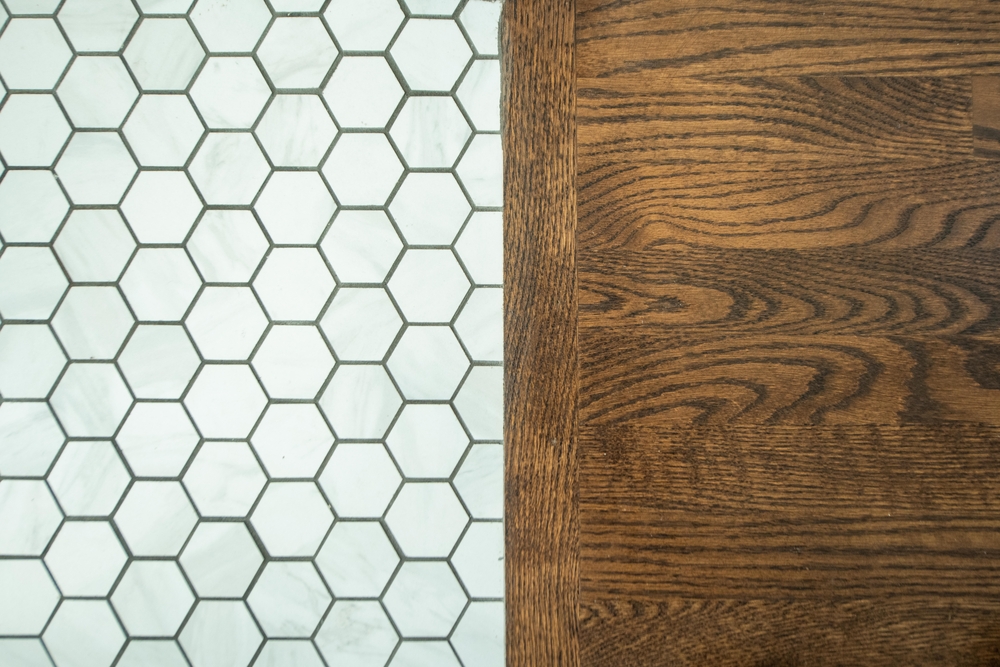
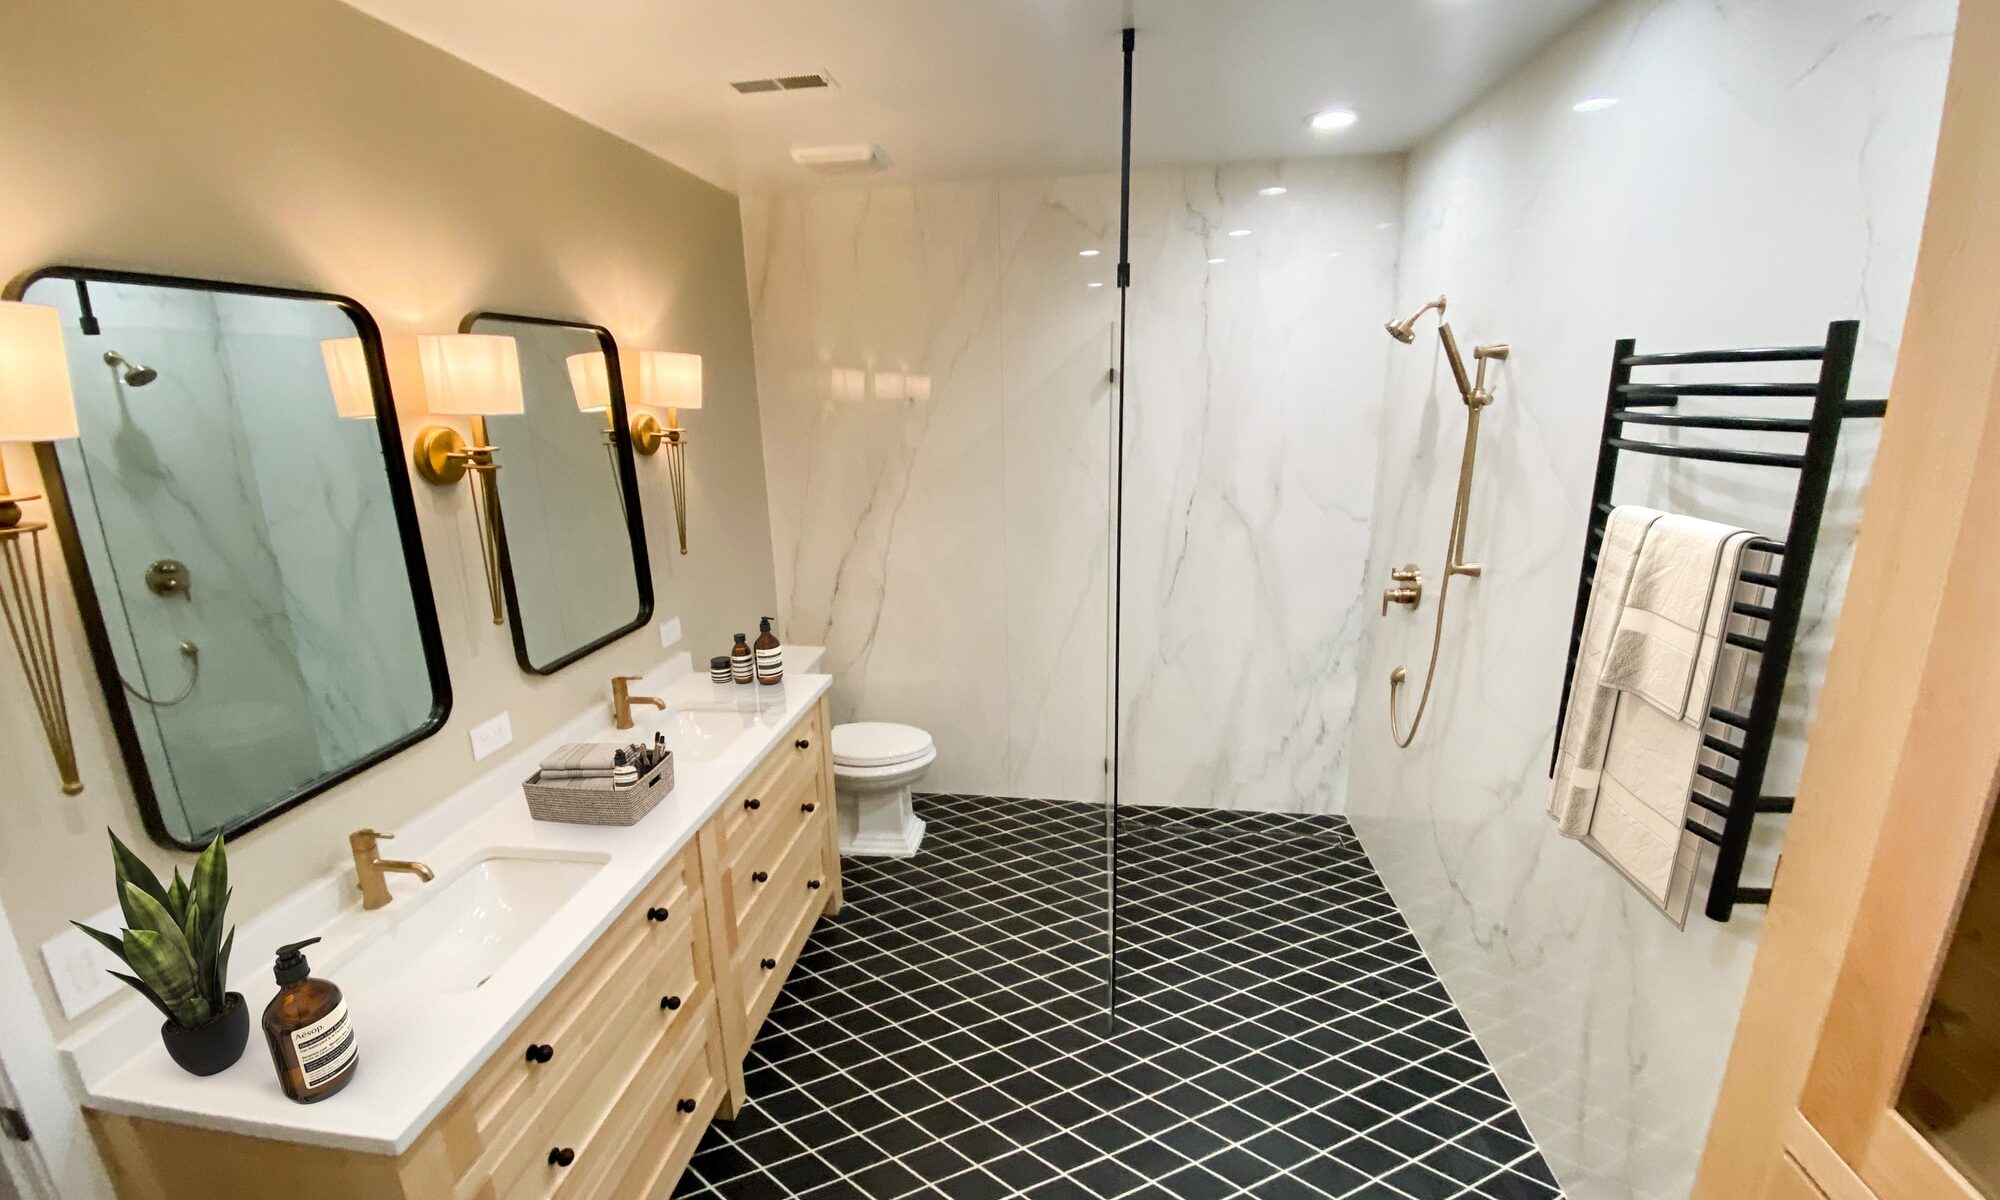
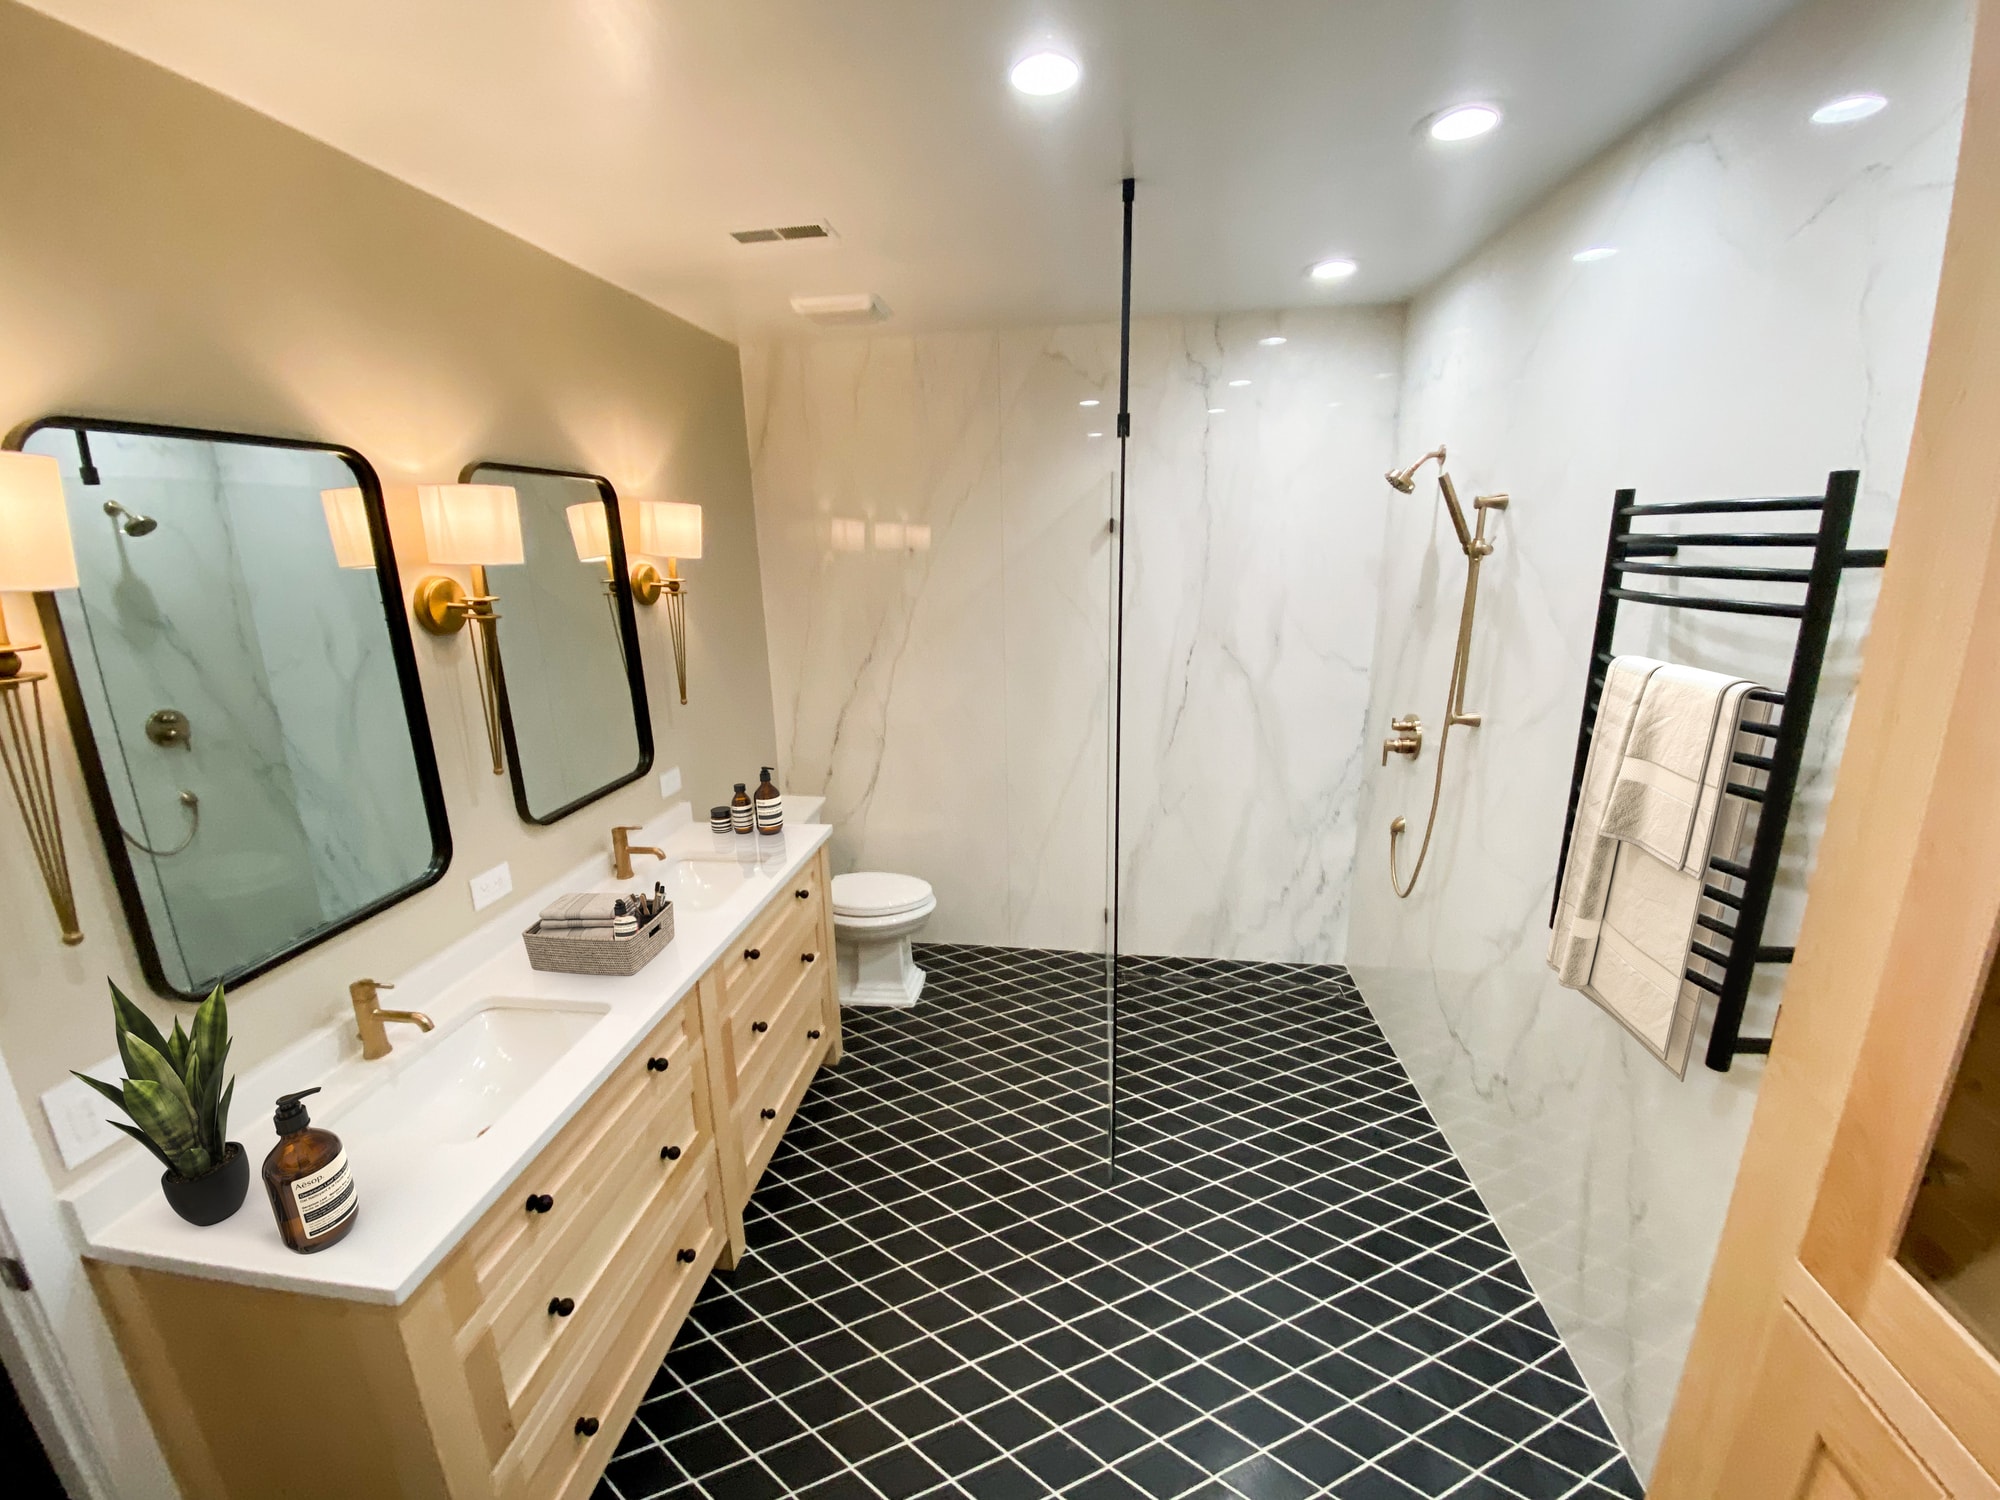
Bathroom renovation updates reflect a total commitment to quality while maintaining the home’s original integrity and design characteristics. Our company performed remodeling of all five bathrooms in this house. Existing wood wainscoting was carefully removed, refinished using the original color, and reinstalled. Missing or damaged wainscoting was reproduced on site. The second-floor bathroom brick exterior window was removed and a wood-framed fully cased shelving unit was artfully built into the former exterior window opening. All floors were refinished and stained in the original finishes. All fixtures are Chicago faucets.

How We Sourced Our Materials

A believes that developing environmentally sustainable construction practices is a vital step toward decreasing any one of our construction project’s carbon footprint, increasing our competitive advantage, and preparing for inevitable government regulations. For these reasons, we saw a perfect opportunity to source only eco-friendly materials for this historic restoration so it continues to last throughout the centuries.

Roofing Materials

Majestic Slate tiles offer the natural beauty of slate while providing enhanced strength and durability. Manufactured from 80% post-industrial recycled rubber and plastic, Majestic Slate tiles offer an environmentally friendly, lightweight alternative to traditional slate roofing products.

Radiant Floor Heat

Hot-water circulatory heating is a heating system utilizing radiant heat from floors and walls which are generated by circulated hot water. Unlike air heating, this user-friendly system produces clean warmth without polluting the air. As neither fire nor electricity is used inside the rooms, it is environmentally friendly as well.

EcoTech Spray Insulation

Composed of over 27% soy and 45% renewables, EcoTech spray foam is a greener product than other spray foam products on the market, which are petroleum-based. Foam insulation acts as a fundamental building block of green construction by preserving the heat and cool air.

Masonry Construction

Concrete masonry lasts longer and requires little maintenance. The need to manufacture new materials is reduced with every new concrete masonry building. Concrete masonry materials can be recycled for other projects into new masonry materials or aggregates. The ability to reuse existing masonry buildings, including entire structures or the core structure, further enhances its sustainable properties.

Concrete masonry can significantly reduce the energy usage of a building because the structure stays warmer or cooler longer. This consistent temperature helps lower energy costs by shifting peak loads to non-peak hours while ensuring the comfort of those who live and work inside the building.

Eco-Friendly TJI Joists

TJI joist production starts in the forest. iLevel, as part of Weyerhaeuser, creates wood products that are produced in environmentally responsible ways, and uses proprietary technologies, from manufacturing to design software, to optimize every tree.

Sub-flooring: OSB Board (Orientated Strand Board)

We installed ecologically advantageous “OSB panels” manufactured from sustainable fast-growing trees of smaller diameters. This OSB panel is produced using lower levels of dangerous formaldehyde when compared with other similar products.

These types of new OSB subfloor panels are sturdy, long lasting, and are certified by the Sustainable Forestry Initiative (SFI) and Forest Stewardship Council (FSC) Chain of Custody Certified wood, which indicates that the wood used to manufacture this material is harvested from conscientiously managed woods.

Lincrusta Wall Coverings & Milk Paint

Our company is a concerned and proactive partner in making environmentally conscious choices throughout the construction process. There are a number of environmentally safe paint alternatives today. According to Environmental Protect Agency standards, in order to be acceptable, the VOC levels of paint must be lower than 250 grams per liter. Paints that contain less than 5 grams per liter can be labeled and sold as “No VOC” paint. Among the new generation of environmentally friendly paint choices, the choice that truly contains no VOCs is milk paint.

Milk paint is one that is not only safe for the environment but beneficial also. One of its primary ingredients – high-grade calcium lime, makes milk paint environmentally friendly. Calcium lime has unique properties in that it is cured through a reaction called carbonization. This paint draws in carbon dioxide from the air as it continues to harden, so when applied to interior and exterior walls and siding, it will continue cleaning the air.

This environmentally safe paint is an actively beneficial choice among Earth-friendly products. Another benefit of natural lime in milk paint is that it acts as a fire retardant. When choosing environmentally friendly paint that is safer for the Earth, you can also have paint that is safer for your home. Lincrusta is made entirely of natural materials, most of which are sustainable and it is still produced traditionally.

See the photo gallery of this project in our portfolio, History Repeats Itself.


Our aim is to achieve excellence by providing the best remodeling services in Streeterville, West Loop, Lincoln Park, Lincoln Square, River North, Gold Coast, Old Town, and Roscoe Village. To discuss the details of a potential Chicago home remodeling project you may have, give us a call at 773-610-4551.

Reduced Square Footage Doesn’t Equal Reduced Costs

Chicago renovations

When it comes to renovating a small area, will it be less expensive?

I think there is a huge misconception that it will be less expensive to renovate a small space. Almost every client that calls us with a bathroom, or a kitchen project will say the words “it’s a small space, so costs should be low.” However, low square footage doesn’t equate to less expensive. Pricing isn’t necessarily based on your square footage, and you still have the same labor involved.

Then you’ll have cost savings – based on square footage, is on the material side, like with buying less flooring. However, when it comes to installation, we will still have the same labor cost.

When it comes to bathroom remodels, even though the space may be small, why is it not less expensive to renovate?

Renovation costs remain the same, regardless of whether it’s a master bathroom or guest bathroom. Some clients may consider replacing the tile in their bathroom and/or shower enclosure as “simple,” when it’s not. What they may not realize is professionals have to remove your tub, vanity or toilet to do the work and clients don’t understand that’s an added labor cost to do that. Labor isn’t exclusive to solely removing your existing floor and replacing it with new tile.

If you think about a large bathroom vs a small bathroom – they have the same components and are not much different. Both are going to have a shower, vanity, and a toilet, and therefore, size isn’t going to make a difference in cost. Their difference is only going to be their square footage.

In a bathroom, what are some of the more expensive projects?

An expensive renovation that clients don’t consider or understand being expensive is converting a tub shower combo into a walk-in shower. A lot goes into that renovation. It starts with rebuilding that entire space. Even though the plumbing remains, you’re removing a tub, reframing the entire enclosure, building the shower base, and then there is the expense of the tile. And no matter what – you still must adjust your plumbing.

What about renovations on a powder room?

Powder rooms are different. A powder room is simpler because it is only a toilet and a sink so costs will be much lower.

Does this same concept apply to kitchen remodels – regardless of square footage?

The same concept applies because you have identical components, regardless of if you want to renovate a small gallery kitchen or a large, open kitchen. Just because your kitchen is small, don’t think it will cost less to renovate.

Be ready to discuss what components in your kitchen you want to keep. If you only want to switch out your sink, fixtures, countertop, and backsplash – and want to keep your appliances, cabinetry, and have smaller upgrades – you’ll keep your costs low.

A client also should consider the work they want to be done and the trades that would be involved in handling that work. For example, if you want to relocate your dishwasher, sink, and move your microwave to the kitchen island, you will drive your costs higher because electrical and plumbing are expensive skills.

Even if you don’t know exactly where you want to put things in your kitchen, you should come to a contractor knowing what you plan to move or rearrange and know what you want to keep or replace. Our job is to help you achieve your vision with our design and knowing what’s possible.

If someone has received quotes from other contractors, what do you discuss with them?

Arete is here to educate clients – especially if they have already received quotes from other contractors. Our pricing is between the mid to high range, so if they’ve already received a couple of quotes, it’s important to ask if another contractor (s) included allowances for their tile on your vanity, or did they price out actual dollar amounts for what the client is looking for?

for us, if a client has an allowance, that’s a red flag, because you’re probably going to get hit with a change order later. Allowances are a contractor’s way of giving you a lower price now for you to sign on with them, and later, the contractor is going to hit you with a more realistic cost.

Currently, giving quotes with allowances is tricky, with everything that’s happening with materials. It’s not uncommon for suppliers to unexpectedly send price increases up to 25 percent on material costs they originally quoted.

What is a change order fee?

A change order is any work above and beyond the initial contract you signed. For example, a contractor may say you need a whole new electrical panel, which is an essential component needed to complete your renovation, and then present you with that additional cost.

How important is it to have a budget?

I always like to get some sort of budget from a client. I know a lot of people are hesitant to give that, but it’s important because – even if we’re not the contractor you select, Arete tries to provide you with alternatives. I believe most people have a realistic budget. You can always do your renovation within your budget, but it’s all about how you do it. If you only want to spend $5,000 on a bathroom remodel, then you’re probably going to have to buy all the material on your own, be your own general contractor for a lot of it, pay for an electrician and someone to install. It all comes down to how much do you want to do by yourself? Also, keep in mind how long you want to live through construction on your kitchen and bathroom.

What about renovating an existing bathroom floor into a heated floor?

Heated floors are really tricky because there is no room for error. There is lots of testing that goes into it because as soon as you get that tile down, you have to make sure the floors still heating and not leaking, otherwise you’re ripping the floor back up for any repairs.

We actually had a client where we redid her guest bath and she had an existing heated floor, which she told us about. With heated floors you must use shorter nails, so you don’t puncture the pipes. We were mindful of that, but during the demo, whoever had initially installed her floor did not use the shorter nails. In the process of ripping the tile out, we unlogged a nail from the pipe, and it caused the leak.

HGTV and the DIY YouTube channels make it difficult for remodel businesses because it looks so easy on TV. At Arete, we would rather bring the client to our job sites that are in process, or recently finished, to show them proper examples. If you’re thinking of a remodel, we suggest clients talk to our prior clients that had a similar project. Contact us here or call us at 773-610-4551 to discuss your potential project with our Chicago home remodeling experts.

Six Major Challenges In Chicago Home Remodeling

When it comes to remodeling your home in Chicago, there are a lot of things you can prepare for…and unfortunately, a lot of things you cannot prepare for. You could have everything picked out and ordered, just to get an email that says your material will be delayed another two weeks. You can also receive all of your materials on time, just for them to arrive in the wrong color or damaged by mistake.

Remodeling your Chicago home can be just as stressful as it is exciting, but it doesn’t have to be with a little bit of extra preparation. Things like knowing the lead time for materials, having a good idea of what you are looking for out of the remodel, and getting living arrangements in order if you have to move out of your home can be the difference between a remodeling dream come true and a remodeling nightmare.

Below are six common pain points that many Chicago area homeowners experience during their remodeling process and how you can do your best to avoid them as much as possible.

1. Timeline

Although we may wish home renovations can be done with the snap of a finger, that is just not the case. From the pre-construction meeting we hold a couple of weeks prior to starting your remodel to the final “To-Do” being checked off our list, this process takes about one to two months on average to complete, and that’s not with any variables being factored in.

If you have an average-sized bathroom, a complete bathroom remodel will take around three to four weeks to be completed. If you are looking to redo your kitchen, that usually takes five to eight weeks depending on the scope of the project.

If you want a complete interior remodel, you’re looking at anywhere from three to six months, and any total rebuild normally requires a timeline from six months to a year. Good things take time, and while we know how frustrating it is to have to leave your home for an extended period of time, we promise it will all be worth it once the remodel is complete.

2. Schedule Changes

When it comes to the schedule of your project, there are a lot of moving parts. We usually have multiple subcontractors working on one project at a time, and it is our project coordinator’s job to make sure that these subcontractors show up on the days that they are scheduled to work in your place.

Typically, we have workers in and out of your project each day, but it is not uncommon for the subcontractors to not be there for a day or two. If something comes up and the subs are unable to work on your project that day, our project coordinators will be the first to let you know about the schedule changes.

They will send you daily updates on the progress of your project that include photos and a list of things the crew got done that day. We dislike when a project goes over schedule just as much as our clients dislike it, so we do our best to ensure that everything gets completed on time and correct the first time.

3. Oversight Errors

With that being said, sometimes things can go wrong in a project. Our latest puzzle that we had to solve was finding a new spot for an elongated shower niche. In the original plan, we had the shower niche stretched along the whole side of the shower wall, but when we started demolition, we found some pretty important water lines that were unable to be moved in the place where the shower niche was supposed to go.

All this took was a simple visit to the project with our interior designer, some discussion with the homeowner, and some new renderings that split the shower niche in half to leave room for the water pipes. This is one of many examples where we had to roll with the punches and find solutions to issues quickly so our schedule doesn’t get delayed.

However, it is important to note that errors and omissions in remodeling occur on every project. People make mistakes, and generally the more complex the project, the more likely it is that errors will occur. It is up to us to fix these mistakes to the best of our abilities so we can keep the schedule moving and our clients happy.

4. Delayed Materials

Supplies of key building materials such as timber, steel, cement, and roof tiles have been dwindling for months, while prices have risen across several materials. This is expected to continue throughout the year at the very least. Covid-19 is primarily the reason behind the building materials shortage. A large reason for this is the social distancing requirements and limited manpower for material production.

These limitations aren’t only happening for US-based materials, but everywhere in the world. On top of the lack of manpower, the demand for these building materials has increased tenfold. As people spend more time at home, they are looking to upgrade and improve their homes. Being confined indoors made people realize that they want to make a lot of upgrades to their space, and what better time to upgrade your space than when you are stuck inside?

Things like a new at-home office space, a play place for your kids in the backyard, and kitchen upgrades are among some of the most common remodels we have seen throughout the pandemic. However, when everyone starts to need the same thing and there are not ample materials and labor to keep up with the demand, this is when delays and increased prices begin to occur.

The cost of materials for repair and maintenance work rose 1.9% between April-May of this year, and increased by 12.8% between May 2020 and May 2021, according to the Department for Business, Energy and Industrial Strategy’s (BEIS) Monthly Statistics of Building Materials and Components report for June.

It is important to make sure that our clients recognize these material and labor shortages and plan for them in their remodeling projects. To limit the delay of your materials, we advise you to minimize customization. The materials that many of our suppliers have readily available come from their standard product lines.

Another important aspect to note is that if you are looking to remodel and then sell, customized homes depreciate faster than a production home. If you design something with just your own family in mind, that same design may not be applicable to the next person looking to buy your place. If you’re remodeling to sell, sticking to standard finishes saves time and money.

5. Difficult Living Situations

Living in the midst of a home renovation is messy, loud, and distracting. While it is inconvenient to stay at your home during a large remodeling project, sometimes it is the only choice you have. First and foremost, your Chicago contractors should have the attitude that they are guests within your home throughout the entirety of the project.

This means communicating with you on a consistent basis, cleaning up any trash, sweeping and vacuuming dust from the construction, and listening to any rules you set in place. While noise is sometimes a difficult thing to control during a remodeling project, noise levels are also something that your contractors should discuss with the client, as well.

If you are working from home and they are doing demolition in your space, it’s important that you prepare for this type of distraction. If it’s possible, we suggest that you move out of the home for the project’s duration. This allows the crews to move unencumbered and complete the project with less downtime than if they’d had to accommodate the family’s schedule. If it’s not possible to move out, remember that the renovation isn’t forever, and the beautiful final result will be well worth the wait…and the noise.

6. Unmet Expectations

Obviously, not meeting our clients’ expectations is something we try really hard not to do. No matter how difficult the project gets or how many curveballs are thrown our way, we always want to make sure that our clients are still feeling confident about their remodel.

However, with that being said, you cannot please everyone. This is something that we have learned the hard way after being in the industry in the Chicago area for twenty years. Homeowners have a lot of expectations when it comes to their house, and rightfully so. We understand wanting things to be perfect when it comes to the space you want to grow in.

Money, time, and effort are all at stake, and sometimes outside forces cause lapses in communication between the contractor and the client. Maintaining good communication with your designated project coordinator as the project progresses is an imperative step to avoid not having your remodeling expectations fulfilled.

Contact The Top-Rated Chicago Home Remodelers At Areté

Areté Renovators strives to make your Chicago home remodeling project as smooth as possible. We are constantly putting new practices into place to improve our communication methods and to properly keep track of all the moving parts your project requires. To learn more about our services, contact us today at 773-610-4551.

Handyman Vs. Contractor Who Should I Hire and Why?

How To Choose Between Hiring A Contractor Or A Handman

With summer finally here, a lot of people are turning toward those home improvement projects that they have been pushing off for a while. While it may seem like a more financially responsible decision to try and complete these projects on your own, the bigger tasks might take some help from a licensed contractor.

Handyman Vs. ContractorHowever, It is true that some home improvement projects take little or no specialized knowledge. Things like painting walls and sealing furniture are easily within the abilities of many weekend warriors. And regular maintenance tasks—such as light electrical work, cleaning gutters, or mending fences—can also usually be easily done with a little research and know-how beforehand on best practices.

This isn’t to say that you can’t do more advanced projects, but it quickly becomes more about how much time you are willing to invest into a project over hiring someone that is already knowledgeable and experienced in those areas. In other words, how much is your time worth and how much do you enjoy learning about carpentry, plumbing, etc.?

When those scales tip the other way, it may be time to invest in a handyman or a contractor. It may be a little difficult to distinguish when a handyman vs. a contractor is needed, but below are some helpful tips on who to hire to get the job done safely and correctly when the task requirement stretches outside of your capabilities.

Before we get into how to choose between a handyman and a contractor, we should first explain the difference between the two. A handyman is a contractor who specializes in installing, altering, repairing, cleaning, and maintaining residential and commercial property. A handyman can also be categorized as a non-invasive contractor whereas a licensed contractor can be categorized as an invasive contractor.

According to the National Association of Home Appliance Contractors (NAHAC), the defined difference between a non-invasive contractor and an invasive contractor is as follows:

“A non-invasive contractor is a person who does manual labor or work requiring special knowledge and equipment for which a special permit or contract is not required in the case of a sudden unexpected change in the circumstances which makes compliance impractical.” This sounds like a really long definition, so in short, it basically means the project doesn’t require a permit to complete.

This type of contractor may perform the work on his or her own premise and disregard third-party interference. An invasive contractor, on the other hand, is a person who does work requiring special knowledge and equipment that also requires a special permit or contract to complete.

They must go through a third-party system for all building approvals before beginning to work on the project. These definitions can often be confusing, especially for people not involved in the home improvement industry.

Ultimately, the easiest way to decide whether you need a handyman or a licensed contractor is to look at the scope of your project. If you have a simple task in mind that you could perform yourself but cannot for some reason or another, then you should consider hiring a handyman to complete it. If it is a home addition or complete home renovation in Chicago that requires special permits, a licensed contractor is necessary for the job.

Chicago home builder
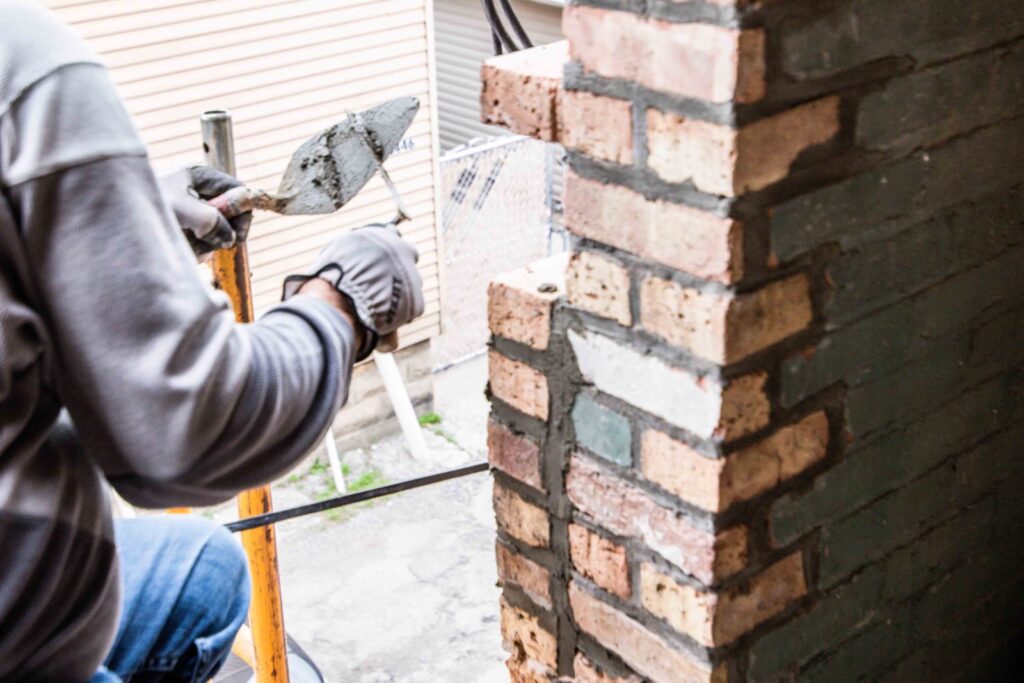
Now that we know the difference between a handyman and a licensed contractor, let’s talk about some of the improvement projects that actually require a licensed contractor.

In general, a licensed or invasive contractor will take on larger projects, such as home additions or major home renovations. This is because these bigger projects require building permits in order for them to be completed.

A contractor license is issued by the government and varies from state to state. In some states, there may be a special certification just for plumbers, or just for electricians.

You may also apply for a roofer contractor or a subcontractor license. In Illinois, plumbing, roofing, and electrical work all require state licensing. A license also enables the contractor to insure their business. If the contractor’s business is already insured, this could save you a lot of money down the road in case any accident takes place on the job site.

It is best to make sure all aspects of the project are insured in order to avoid any legal issues down the road. A general rule of thumb to determine what type of licensed contractor you need is to just simply look up what your state requires. If your project is going to cost $750 or more, a license is necessary to bid on that job. A contractor will need a license to work if the job, including labor and material, exceeds $2,000.

Our project coordinators at Arete are knowledgeable individuals that are educated on Illinois’s licensing requirements. When you choose to work for us, we will do all of the detailed work for you so you don’t have to worry about any surprises along the way.

On the other hand, if your project does not exceed $750 in order to complete it, but you still can’t find the time to do it yourself, that is when a handyman should be considered for hire. For example, installing doors, laying backsplash tiles, painting walls, or adding new fixtures are a variety of things that can be completed with unlicensed outside help. They’re non-invasive tasks and usually don’t break the bank to complete.

When choosing a licensed contractor, it is important to understand where you can find the most qualified people for your project. These references can help narrow down the list of appropriate contractors that can meet your needs and address any concerns you may have.

With Arete, for example, you can look at our Google and Yelp pages for any helpful reviews on what it is like to work with our team. If someone can vouch for your contractor’s experience and competence, you will likely be able to come away with a higher-quality contractor.

While some contractors have knowledgeable associates who can give you the inside scoop on features of a certain product, interactions with these professionals can be labor-intensive and require extensive training. So it’s important to know what you are getting yourself into before agreeing to hire a certain person for the job.

Another factor that can affect the selection of a contractor for your project can be the cost, but this can certainly be a factor sometimes also ruled out altogether if you are looking to invest in something substantial in order to get a bigger return.

At Arete, we are focused on the needs of our clients and how we can get them the biggest return on their investment. We make sure to ask the important questions and ensure we are understanding your vision, budget, and giving realistic expectations and advice on where you will get the most bang for your buck.

Knowing the difference among reputable contractors, electricians, and plumbers comes down to safety. First, if you are looking to get some electrical work done, it is important to know that electricians must be licensed and bonded according to state and local laws.

Electricians also have to follow specific codes when doing repair work on residential properties. If they can’t follow the codes, they won’t safely complete the job. The same goes for plumbers.

However, while it’s usually safer to hire an electrician or plumber to execute the job, it is always a good idea to have, at a minimum, structural engineers or independent contractors check the structure for safety grounds before the job begins.

Communication is also another important aspect to consider. Contractors must be timely, detailed, accurate, responsive, and flexible in the way they communicate. If a contractor delays communication or communicates inadequately before they are awarded a job, they will usually behave even worse during the project. In short, knowing who to hire in these crucial situations is paramount.

To get the job done right the first time, look for references from reputable, upstanding companies who work with contractors on similar projects. With Arete, for example, you can look at our Google and Yelp pages for any helpful reviews on what it is like to work with our team.

If someone can vouch for your contractor’s experience and competence, you will likely be able to come away with a higher-quality contractor. In addition, if you have a strong network of local contractors who are also doing jobs on similar terms or invoice the higher-end services of their peers, you will not have to shell out extortionate amounts for substandard work.

If you are searching for top-rated home contractors in Chicago, look no further than Areté Renovators. Our aim is to achieve excellence by providing the best condo and home remodeling services in Streeterville, West Loop, Lincoln Park, Lincoln Square, River North, Gold Coast, Old Town, and Roscoe Village.

Spend more time outdoors this summer and less time researching who to hire for the job. We got your back every step of the way. Get in touch with us for a consultation today! Call 773-610-4551

How Interior Design Affects Fine Dining: Home and Away

Interior Design For Fine DiningIt is safe to say that the world really had to adapt to Covid-19’s grip on every aspect of our lives. The last 15 months have been nothing short of difficult for many people, and it has really opened our eyes to how we can modify our way of living and overcome our issues together instead of individually.

One of the many industries that Covid-19 took a huge toll on was the food and restaurant industry. According to a recent survey conducted by the National Restaurant Association, the restaurant and foodservice industry likely lost nearly $120 billion in sales during the first three months of the pandemic alone. And that’s only the tip of the iceberg.

Many Chicago area restaurants had to close their doors for good, unable to keep up with the slow trickle of business and lack of workers. As things start to open up and vaccines begin to roll out, restaurants are starting to get back on their feet again as they comply with the new set of rules and regulations that are being announced by the CDC sporadically.

However, that does not mean things can be picked up right where they left off. Many Chicago restaurants are trying to dig themselves out of the hole 2020 gave them. Things like outdoor dining and take-out are still being encouraged in order to support these restaurants and keep others safe.

Interior Design And Fine Dining

Chicago is starting to feel like its bustling self again, and this is especially thanks to restaurants and bars conforming and adapting to the changes, but we are not in the clear just yet. Covid is still an issue that will not be going away anytime soon.

While Covid may be loosening its grip on the world, it hasn’t completely let go of it yet. This raises the question of how patrons and restaurants can bounce back from a year-long hiatus of fine dining services. There are many creative solutions to this question, but the main issue here is how can we make people feel safe again.

How these restaurants create an environment that feels safe, welcoming, and clean will be the difference between them surviving after the pandemic and thriving after the pandemic. Many of these issues can also be applied to at-home dining, as well. Things like lighting, ambiance, and design of the space have a much greater effect on your dining experience than one may think.

While many people are still choosing to stay home, there has never been a better time for an interior facelift. Below are a couple of creative and simple ways to take your fine dining experience to the next level through interior design and make up for all the delicious meals you missed in 2020.

Color

When you are designing a space for a restaurant, it is important to create a look that aims to tap the customer’s senses just right. Successful restaurants know exactly who their target clientele are, and it’s how they’re able to conceive and build a carefully engineered experience around their needs and desires.

With this being said, sight is almost always the first means by which you gather information and make judgments on an establishment, especially if you haven’t been to that restaurant in over a year (or ever). Lucrative restaurants recognize this, and they take great pains to use it to send the right information.

Color is one way you can influence customer behavior. If you are looking for new ways to elevate the look of your restaurant and draw new customers in, using specific colors is one of the simplest ways to do so. Take the color red for example. It is scientifically proven to raise blood pressure and increase heart rate when one looks at it, thus increasing one’s appetite.

And what’s a better way to get your clientele to order more food than psychologically increasing their appetite? Now we know red is a bold color, especially in fine dining restaurants, so it is important to use it subtly and with a purpose. Look at this red leather booth below for example. It catches your eye, but it does not overwhelm the space.

You can also incorporate this color onto your walls as a quick and simple solution to bringing in a more high-end look and indirectly making your guests hungry for more. Other colors like orange and yellow are also appetite stimulants.

Yellow is associated with happiness, which will then translate to your guests feeling happy about the restaurant they chose and the food they ate. We would recommend steering clear of any grays, blacks, blues, or browns unless they are used as accent colors in the space.

Research suggests that this is because these colors rarely exist in nature in the form of food and cause consumers to either lose their appetite or not think of food at all when walking into the establishment.

Lighting

Fine Dining
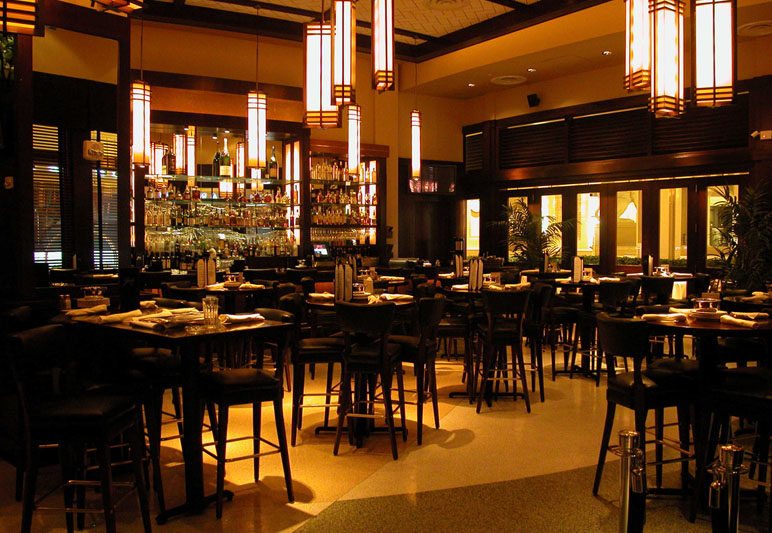
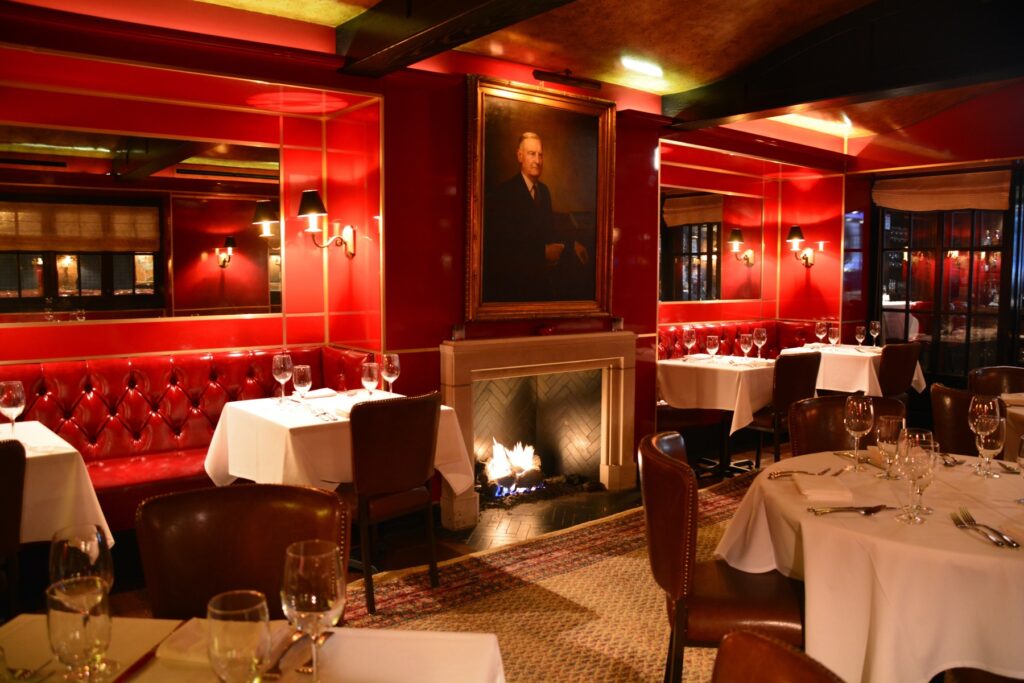
Choosing the lighting of your restaurant space is solely based on the vibe you want to give off to your clientele. In many cases, the more high-end the restaurant is, the more dimly lit the space will be. If you want to take your restaurant to the next level and attract a more high-end clientele, lighting would be the first detail to address.

When you are choosing the correct lighting for your space, there are three types of light to consider: ambient, task, and accent. Ambient lighting is the type of lighting that sets the tone of the entire space. It is the overall illumination of the environment, and it is also what gives the first impression when you walk into the restaurant.

Low lighting creates an intimate, upscale atmosphere, especially in a restaurant’s bar and lounge areas, where patrons are more apt to sit closer together. Bright lighting, however, creates a more busy and animated atmosphere that typically screams casual dining. Depending on the mood you are going for, low lighting has been proven to produce more profitable results.

In addition to ambient lighting, task lighting is a little bit more flexible to work with. Everyone appreciates good task lighting when it comes to things like reading the menu, walkways, and cooking the food. Adding more high-end task lighting to your space can be as simple as placing a candle in the middle of each table or hanging a mini chandelier over each section. Creating better task lighting does not have to be expensive, and your guests will appreciate not having to pull out their cell phone flashlights in order to read the drink specials.

Finally, there is accent lighting. This is probably the least important of all the three, but when used correctly, it can make the whole space. It is decorative rather than functional and is typically used to illuminate things the restaurant wants the guests to notice.

For instance, items like paintings, sculptures, menus on the wall, and bars are all illuminated by accent lighting. It draws the customer’s eye and brings attention to smaller details in the space. When combining all three of these lighting elements together, it can change the whole ambiance of the environment in a positive way.

Fine Dining for the Home

Fine Dining In Chicago
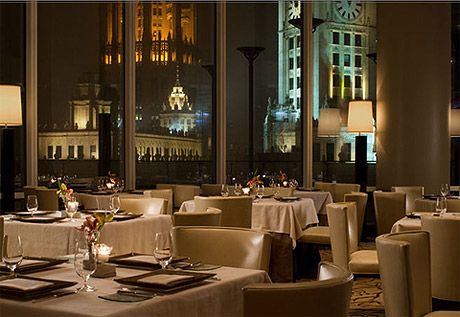
Of course, not everyone is a restaurant owner or ready to go back to eating indoors quite just yet, but that does not mean you cannot translate lighting and color to affect the mood of your at-home dinner party experience. If you are like one of our great clients, Jill Lowe, you realize the importance of a fine dining atmosphere in the comfort and safety of your own home during these ever-changing times.

Jill, like many others, adapted to the at-home style of fine dining for two during the pandemic, and she did not disappoint. Check out her article that explains just how she was able to create a fine dining experience with a little help from Areté here. We were able to renovate the interior of her home to help give a high-end ambiance to any dinner party she is willing to throw, whether that be for two or twenty.

She experimented with table settings, task lighting, floral arrangements, and recipes that were inspired by some of her favorite Chicago area restaurants. She understands the importance of how color, lighting, and mood can affect the fine-dining space and made sure to incorporate all of these elements into each experience she created. If you are still unsure about dining indoors, you can always follow the advice of Jill and create a fine dining atmosphere while still supporting your local restaurants.

Take-out can be just as fun, if not better when you get to decide how to set the table. And when you finally feel comfortable enough to begin visiting your favorite restaurants once more, make sure to keep an eye out for these tiny details that make your dining experience that much more special.

If you are looking for an interior facelift to your restaurant or home that reflects a high-end ambiance, look no further. Areté Renovators can help turn any space into an upscale dream. Our aim is to achieve creative excellence by providing the best remodeling services in Streeterville, West Loop, Lincoln Park, Lincoln Square, River North, Gold Coast, Old Town, and Roscoe Village. Breathe some art into your space and get in touch with us for a consultation today! Call us at 773-610-4551.